Hall or Nothing Productions Ltd

Thursday, September 22, 2011

NinjaDorg's PDFs for Dungeons & Dragons Wrath of Ashardalon and Castle Ravenloft


Here's all the PDFs and campaign rules for Wrath of Ashardalon and Castle Ravenloft.
Just need to upload hi res pdfs of the monsters now...


The Lord of the Rings: LCG - The Hills of Emyn Muil preview


Original article here:


Goblins don’t care who they catch, as long as it is done smart and secret, and the prisoners are not able to defend themselves.
    –J.R.R. Tolkien, The Hobbit
Soon, the heroes of Middle-earth will arrive at The Hills of Emyn Muil, the fourth Adventure Pack for The Lord of the Rings: The Card Game. Amid the barren slopes and stones of Emyn Muil, Gollum’s trail grows cold, and the heroes must explore the craggy terrain for fresh signs.
Hillsides full of hidden threats
In The Hills of Emyn Muil, your fellowship must cover a lot of ground and must do so quickly. The longer they take, the further Gollum gets ahead of them, the colder his trail grows, and the more likely your heroes will lose it entirely amid Emyn Muil’s many treacherous twists and turns.
As they travel, the rocky landscape serves both to hide the heroes from all but a handful of their enemies… and to hide their enemies from them. The Hills of Emyn Muil feature less combat than some other Adventure Packs, such asConflict at the Carrock, but the combat dynamic takes a dramatic turn toward hit-and-run tactics.
Utilizing Shadow effects like those on The Outer Ridge (The Hills of Emyn Muil, 89), enemy combatants stage multiple skirmishes, striking at your heroes, then racing back into the hills before you can retaliate. This can force you to exhaust more and more of your fellowship as you need to commit more Willpower to the quest to make progress past the threat of the pack of enemies following on all sides. Bad turns to worse as exhausted heroes can neither defend nor attack, and as your allies get weary or fall prey to Orc skirmishers, your heroes become vulnerable.
Cards like Hasty Stroke (Core Set, 48) and A Burning Brand (Conflict at the Carrock, 33) can help your heroes trap the enemies that engage with you, but if you don’t draw them quickly enough–or if you play your last Hasty Stroke and run out of options–you may find enemies launching attacks at you each turn, with several of them escaping to gather reinforcements. Even a small band of enemies able to elude your heroes can defeat your fellowship if your heroes are unable to counter.
Hunting the enemy
Fortunately, players have a few options to deal with retreating enemies. Dúnhere (Core Set, 9) can ride them down, even in the staging area. Armed with a Blade of Gondolin (Core Set, 39) to increase his Attack strength, Dúnhere can cut through most Orc enemies, speeding your fellowship’s progress and keeping your backs free from threat.
Some foes may be too powerful for Dúnhere to dispatch, however, and you may need to provide him some assistance. Enter the eagles…
If you’re already playing with the Tactics sphere to arm Dúnhere, then The Hills of Emyn Muil provides you another resource to deal with pesky skirmishers. Descendant of Thorondor (The Hills of Emyn Muil, 75) allows you to deal two damage to any enemy in the staging area when you bring him into play and, again, when he leaves play. This can make the Descendant of Thorondor an excellent target for a Sneak Attack (Core Set, 23), and it means that even if he makes the ultimate sacrifice, defending the fellowship at the cost of his own life, the Descendant of Thorondor does not fall easily.
Prepare for the unexpected
Shadow effects add a dramatic element of surprise to combat in The Lord of the Rings: The Card Game, and The Hills of Emyn Muil feature challenging new Shadow effects that continue to change your game experience. Each Adventure Pack in the Shadows of Mirkwood cycle has introduced a scenario that focuses on different aspects of the game, populating your travels in Middle-earth with new perils.
As the time draws nearer for your heroes to step into The Hills of Emyn Muil, you may wish to seek advice from other members of our community forums as to how you may develop the flexibility you need to deal with the different challenges of multiple scenarios.
Finally, Fantasy Flight Games wishes happy birthdays to both Bilbo Baggins and Frodo Baggins, who celebrate their birthdays on September 22nd. Join us in our celebration, and try building a deck to use both of these legendary heroes!

Wednesday, September 14, 2011

Jupiter Rising Doom TBG campaign by BarbarianWanderer

Looks like a ton of work went into this fan made mod for Doom: The Board Game, for those of us that still have and love this classic sci fi shooter...

Jupiter Rising pictures by BarbarianWanderer - Photobucket:

'via Blog this'

Example map:

Scenario 1: TheMorpheus--Map

Tuesday, September 13, 2011

Sacrifices in The Hills of Emyn Muil


New update from FFG here:


“I am Aragorn son of Arathorn; and if by life or death I can save you, I will.”
   –Aragorn, The Fellowship of the Ring

One of the traits that most distinguishes Tolkien’s noblest heroes and holds them firmly in our minds is their willingness to make sacrifices. In addition to Aragorn’s oath, Tolkien gave us several stunning examples of individuals becoming heroes through their actions. Gandalf buys the Fellowship time to flee the Balrog. Boromir redeems himself by racing to protect Merry and Pippin at the cost of his life. The armies massed at Minas Tirith ride to the Black Gate of Mordor with little hope but that they might buy Frodo some time for his quest with their deaths.
Similarly, The Lord of the Rings: The Card Game features myriad opportunities for players to make sacrifices for each other. Players recognize that they’re working together in this cooperative game and constantly make decisions for the good of the party, not just for themselves. Characters with Sentinel allow players to defend across the table, timely intercepting attacks that might be lethal to other heroes. Players can play attachments on heroes other than their own, letting other players accelerate their resources with Steward of Gondor (Core Set, 26) or Horn of Gondor (Core Set, 42) or giving them additional power to quest with Protector of Lorien (Core Set, 70).
The Hills of Emyn Muil
With the upcoming release of the fourth Adventure Pack in the Shadows of Mirkwood cycle, The Hills of Emyn Muil, players will have more reason to consider making sacrifices to protect the fellowship, and they’ll have more to gain from the sacrifices they make.
After A Journey to Rhosgobel, Gollum’s trail leads the heroes south, where it grows cold. Now, the heroes must explore the vast expanse of The Hills of Emyn Muil, in the hopes of rediscovering the trail and following it wherever the elusive creature has fled…
This scenario places a heavy emphasis on the fellowship’s ability to quickly and efficiently explore a number of locations as they fend off skirmishing enemies and look to catch sign of Gollum’s trail. As the journey grows long and the heroes grow tired, a new Leadership sphere event, Rear Guard (The Hills of Emyn Muil, 74) can help them renew their focus and redouble their Willpower.
Finding their way forward
It was the third evening since they had fled from the Company, as far as they could tell: they had almost lost count of the hours during which they had climbed and laboured among the barren slopes and stones of the Emyn Muil, sometimes retracing their steps because they could find no way forward, sometimes discovering that they had wandered in a circle back to where they had been hours before.
    –The Two Towers

Frodo (Conflict at the Carrock, 25) and Samwise got lost for days in the barrens of the Emyn Muil, and the heroes of Middle-earth may face the same fate unless they draft a plan to navigate their way through the slopes and stones. Veterans of The Lord of the Rings: The Card Game know they must act quickly to prevent the staging area from filling up with unexplored locations. If they don’t, their quest is quickly opposed by threats from all side, and their fellowships can make no progress forward.
The sacrifice of Rear Guard enables players to force their way past a threatening pile of locations and enemies. The more heroes committed to the quest, the more a single Rear Guard can help the fellowship near its goal. This can be particularly useful when encountering such deadly locations as Rauros Falls (The Hills of Emyn Muil, 87).
Because you’ll need a hero with the Leadership icon to pay for Rear Guard, some fun Leadership combinations may come to mind. The ubiquitous Snowbourn Scout (Core Set, 16) places a progress token on a location of his choice when he comes into play, and can then benefit the fellowship’s quest by serving as Rear Guard. Prince Imrahil (A Journey to Rhosgobel, 50) will stand the first time an ally leaves play each round, allowing him to combat enemies after questing–and to quest at an extra Willpower!
Or you can time your actions to gain the services of Faramir (Core Set, 14), using him to give an additional Willpower to all questing characters controlled by a single player, then benefitting from his sacrificial duty as Rear Guard. As a four-cost ally, Faramir may be too expensive to sacrifice so readily, but if he drops in for a Sneak Attack (Core Set, 23) and gives players the ability to exhaust him for his text before sacrificing him as a Rear Guard, then he gives a massive boost to the party’s Willpower for a mere two resources and two card draws.
Commit to the journey
As the saying goes, it’s not the destination that counts; it’s the journey. Prepare to enjoy the scenic vistas and to encounter the native wildlife of The Hills of Emyn Muil when this Adventure Pack releases later in the month. Until then, dig out your maps, find a guide, prepare your fellowship, and though you may hope that it won’t come to it… you may need to make some sacrifices.

Lord of the Rings: The Card Game NinjaDorg's Scenario 7 - Teasers

For your amusement:


Fantasy Quest Session Report: Some days EVERYTHING goes your way

An excellent narrative Fantasy Quest session report by BGGer Toc13 (Chris Stanton):

Setting off from the stinking, filth-ridden cesspit of corruption that is Sprawl City, I immediately move off the beaten track. I figure the fewer people see me, the better. Making my way through the old wood, I decide to give the consecrated altar I saw a wide berth- Not really my scene. Crossing a clearing in the forest, I spot a witch in the distance. Knowing them to be quite nasty when annoyed, I stayed out of sight only relaxing once she had gone. Night was closing in & the weather was turning chilly so I set up camp beside a spring that was reputed to have healing powers- a bit of insurance if anything happened. I had no sooner done this when the skies opened & hail came pelting down...but I was safe & warm...

To read more click here:

Some days EVERYTHING goes your way | Fantasy Quest | BoardGameGeek: "The Tale of the Vampire Assassin:"


Monday, September 12, 2011

Fantasy Quest Solo game: DEMON WIZARD "Live to tell..."

Brilliant session report from BGG user Lestat Lioncourt:

"Solo game: DEMON WIZARD "Live to tell...""

Being the youngest ARCANE DEMON sucked. There was no way he could compete with any other DEMON of their CLASS. Most of them were done with their training and spend parts of their free time using SPELLS on him which he struggled to fend off. He was quite good with his dagger, but the older DEMONS rarely bothered to teach or train him.
Early on he discovered that CHARM got you much further at times than physical strength. Worked especially great on a drunken DEMON.


To read more click here:

Solo game: DEMON WIZARD "Live to tell..." | Fantasy Quest | BoardGameGeek:

Friday, September 09, 2011

The Lord of the Rings: The Card Game - Khazad-dum Expansion more info

Fantasy Flight Games [The Lord of the Rings: The Card Game - Khazad-dum Expansion - About] - Leading publisher of board, card, and roleplaying games.: "The Lord of the Rings: The Card Game - Khazad-dum Expansion"


“For a while we had news and it seemed good: messages reported that Moria had been entered and a great work begun there. Then there was silence, and no word has ever come from Moria since.”
–Glóin, The Fellowship of the Ring
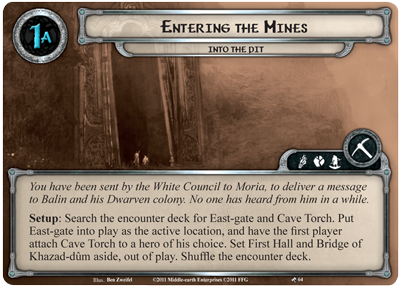
It has been many years since the Dwarves last heard from Balin. Now the heroes of Middle-earth must search for signs of him and his fledgling Dwarven colony.
Khazad-dûm is the first deluxe expansion for The Lord of the Rings: The Card Game, expanding your game with 165 new cards. Two new Dwarf heroes offer their services, and players gain the benefit of new player cards (three copies of each) while facing new scenarios filled with perilous locations and a menacing host of enemies.
The road goes ever on
The Lord of the Rings: The Card Game offers a unique, narrative play experience for cooperative or solo play. Middle-earth’s heroes undertake fantastic quests that lead them to distant and dangerous locations. Along their journeys, they must battle past enemies and steer away from the Dark Lord’s reach and the treachery he plots for them.
The story that began with the Core Set continues to expand further into the world of Middle-earth with each new release.
Where the Core Set and Shadows of Mirkwoodcycle of Adventure Packs explored the forests of Mirkwood and related the trials of chasing creatures through the wilds, Khazad-dûm evokes the ominous dread of your fellowship’s dark and perilous journey through Moria’s abandoned tunnels.
The mines of Moria
“The wealth of Moria was not in gold and jewels, the toys of the Dwarves; nor in iron, their servant… For here alone in the world was found Moria-silver, or true silver as some have called it: mithril is the Elvish name.”
–Gandalf, The Fellowship of the Ring
With no map nor guide to lead them, your heroes must light their torches and find their own way through the intersecting mines. Khazad-dûm introduces a number of dreadful new Underground and Dark locations, any of which may hold the clues to Balin’s silence that your heroes seek.
Fortunately, Dwarves are little bothered by the dark, and Khazad-dûm provides a wealth of new player cards that expand design options for any deck, but particularly for those with Dwarves! In addition to two new Dwarf heroes,Khazad-dûm strengthens the Dwarven contribution to any fellowship with new Dwarf allies, attachments, and events.
Drums in the deep
New treachery and a horde of new enemies await Middle-earth’s heroes amid the dark, Orc-infested mines of Moria.
The encounter sets in Khazad-dûm provide thrilling new challenges that will keep your heroes peering cautiously around each corner as they must face Orcs, goblins, and cave-trolls. Along their way, they must avoid the hazards of underground travel such as cave-ins, pitfalls, crumbling stairways, and impassable chasms. If your heroes take the wrong turns or delay too long, they’ll find that the Orcs of Khazad-dûm swarm against invaders in astonishing numbers. And while your heroes maneuver past the onrushing hordes, they risk delving too deep and waking the nameless fear.
Beyond the mines
From Orcs and Trolls to Ringwraiths and Dragons, Middle-earth is a rich and expansive world, filled with fantastic and iconic creatures. As you venture into the ancient Dwarven realm of Khazad-dûm, you’ll enter a place in Middle-earth far removed from the settings and creatures represented by the Core Set encounter cards. Dark tunnels teem with goblins, and any wrong turn could send you plummeting through pits to find yourself confronted by older and fouler things than Orcs.
Therefore, in addition to expanding your existing game experience, Khazad-dûm introduces nine all-new encounter sets! These unique sets, when combined into encounter decks (as instructed by the rules), make upKhazad-dûm’s three included scenarios.
It’s also important to note that you will need these new encounter sets to play the scenarios of the subsequent Dwarrowdelf cycle of Adventure Packs.
So while the Khazad-dûm expansion is an exciting addition in its own right, it’s also the first step in the game’s next engaging narrative. With it, you’ll have the option of bringing new regions to your gaming experience. Explore more of Middle-earth than ever before, from the forests of the Core Set and the Shadows of Mirkwood cycle, to the perilous caves and treacherous peaks of the Misty Mountains.
Will your passage through Moria be tragic or heroic? The Dwarven kingdoms await word of Balin and his fledgling colony, so strike up a torch and head into the depths of Khazad-dûm!

Khazad-dûm - deluxe expansion for The Lord of the Rings: The Card Game

Fantasy Flight Games [News] - Khazad-dûm:


“Moria! Moria! Wonder of the Northern world! Too deep we delved there, and woke the nameless fear. Long have its vast mansions lain empty since the children of Durin fled. But now we spoke of it again with longing, and yet with dread; for no dwarf has dared to pass the doors of Khazad-dûm for many lives of kings, save Thrór only, and he perished. At last, however, Balin listened to the whispers, and resolved to go.”
–Gloin, The Fellowship of the Ring

Fantasy Flight Games is proud to announce the upcoming release of Khazad-dûm, the first deluxe expansion for The Lord of the Rings: The Card Game!
Khazad-dûm transports you to the ancient realm of the Dwarves with 165 new cards (with three copies each of its player cards), including new scenarios, encounter sets, heroes, allies, attachments, and events.
Unravel an old mystery
It has been many years since the Dwarves last heard from Balin and his fledgling colony. Reports have ceased to flow of the great works they began. Now the heroes of Middle-earth must search for signs of them among the mines of Moria.
Khazad-dûm presents you with three thrilling scenarios set in the dark, underground tunnels of the legendary, abandoned Dwarven city. Along the way, your heroes will be challenged by treachery and enemies from all-new encounter sets, including swarms of Orcs, goblins, and cave-trolls.

Legend of Drizzt fan cartoon - Road to Mithril Hall - YouTube

Road to Mithril Hall - YouTube:

Legend of Drizzt fan cartoon - pretty cool actually...

Thursday, September 08, 2011

Dungeons & Dragons Roleplaying Game - D&D Skirmish Board Game Playtest

D&D Skirmish Board Game Playtest


Dungeons & Dragons Roleplaying Game Official Home Page - Article (D&D Skirmish Board Game Playtest): "D&D Skirmish Board Game Playtest"

Worth a look now that we all have tons of minis from Castle Ravenloft and Wrath of Ashardalon...

Wednesday, September 07, 2011

Fantasy Quest Solo Session - The Vampire Warrior and the Dragon's Hoard


Fantasy Quest Solo Session - The Vampire Warrior and the Dragon's Hoard


Well, whilst we wait for a session report from someone who isn’t me I thought I’d tide you over with another adventure from someone who is me.  Just ran through another quick solo session tonight and randomly drew a Male Vampire Warrior with the Berserker Class Skill.  My strategy would be to throw myself into any fights and try to ignore damage, using the Vampire’s special ability to heal up again after winning fights.


 My Hero’s Saga was to steal back the Dragon’s Hoard and save the people of the land from the rampaging Wyrm.

For my starting Reward I unwisely chose the easy trap of picking an Ally.  Allies grant Keywords but also give you a boost to your stat(s), and so make great starting Reward cards.  However, I didn’t need an Ally to defeat my Saga and should have chosen a Reward that would grant me a required Keyword instead.  Nevertheless I set off to go and enlist the weird Necromancer I had heard so much about.  And she proved quite agreeable to be fair.

Early on whilst travelling I was challenged to a Duel – luckily I excelled at Fighting and bested my competitor, earning myself the Martial Class Skill ‘Hunter’, which allows you to heal when ending your turn in a Mountain Location.  This can be very useful for counteracting the detrimental effects of Gloom, particularly in the later game.

Reading my Saga it was clear that the trickier Keywords to obtain were going to be the ‘Abode’ (a type of Place) where a certain ‘Order’ (a type of Title) of individuals were holed up.  The people of the land needed the help of this special Order to overcome the tyranny of the Wyrm, and I would need to become one of this Order to enlist their aid.  Titles come from Places, and Places are most commonly found in Forests.  So I set about exploring as many Forest Locations as I could as the land around me started falling into Gloom.

Soon I was joined by a Barbarian who lent her sword to the battles I was fighting as I travelled: a lizardman ambush, a zombie crawling from its grave, and a deadly Gargoyle which I was only able to overcome by going Berserk.  The Barbarian accompanied me to the lair of a Summoner who also joined the quest.  Summoners allow you to choose Spells instead of the normal Reward for defeating encounters, and I needed a Spell for my Saga.  This nice little synergy let me grab another vital Keyword (Spell) after dealing with a Brigand who was terrorising the area.

Before long I had gathered most of my Saga’s Keywords and was carrying with me a great Dwarven Axe, the spirit of a Battle Elemental, the scalps of some evil Bandits, and the blessings of a wandering Watchman and a Tradesman who I’d met and successfully Influenced whilst on the road.  I’d even found the Abode I was after – the Forgotten Ruins – but the land around it had Fallen into Gloom, meaning any time I spent there would damage my Vampiric Warrior.  I hesitated, preoccupied with a foolish Wager, and Excessive Taxes that drained my coffers, and was further beset by a Jousting match and a Gentleman with a grudge – who I ended up having to dispatch in bloody combat.


Meanwhile the agents of the Ancient had been busy that Night.  A Demonic Rite was performed which destroyed the Forgotten Ruins entirely, and the prospect of exploring my precious Abode was gone for good.

This was the late game now, and I was paying for not having acted fast enough, and for not having picked up a Title Reward to start with.  Safe Locations were becoming scarce as Gloom eclipsed the lands everywhere.  With a meagre haul of cash I raced back to Sprawl City – one of the few remaining safe Locations - and enlisted the help of a dashing Corsair, whose Sneaky, Shadowy skills would be essential to finishing my Saga.  As the Days turned into Nights, and a Freezing Snow enveloped the countryside I continued exploring, desperately hunting for that elusive Abode.

A Pilgrim gave me information about the iniquitous Thieves’ Guild operating near Sprawl City and I set out to shut them down.  In doing so I ended up giving chase to a famous Criminal, who evaded my efforts.  Then, after being robbed of my Horse I tracked down the Thief responsible and taught him a lesson he wouldn’t forget.  But all this was a distraction and there were only a few days left before the Ancient one would awaken and enslave or destroy the Kingdom.

With time fast running out as I wandered the Forestland I was delighted to finally discover an Abode – the Lost Village – where I would be able to take stock and come back from a position of strength.  After successfully exploring the Lost Village I had acquired 7 of my 8 required Keywords but it was too late.

I staggered into the Old Wood for shelter as the heavens opened up and pouring rain pelted down around me.  With just hours to go I still hadn’t discovered the mysterious Order who would help us find and retrieve the Dragon’s Hoard.

As I slogged through the muddy, wet undergrowth, my companions around me in dread filled-silence, hope fading fast, I looked up into the pouring clouds once more.  And the ground opened up beneath me.

The Vampire Warrior fell into a Bottomless Pit and was lost forever.  From far away in the distant Mountains the Dragon King’s terrible laughter could be heard, and the people of the land gathered around their hearths, cowering in fear…


My only remaining Keyword was ‘Order’ and I’m still kicking myself that I didn’t take a Title to start the session off with.  I might not even have picked up an ‘Order’ card, but I would have at least had a healthy 1 in 3 chance.  The game took about 50 minutes to play through to finish, excluding setup.

LOTR: LCG Massing at Osgiliath Review


Massing at Osgiliath

Warning: this review contains a whole bunch of spoilers.

After the overwhelming response to my review of the then-new and interesting Hunt for Gollum:


followed by the underwhelming response to my review of the rather disappointing Conflict at the Carrock:


hopefully this review will leave you feeling averagely whelmed.

First off, I haven’t played A Journey to Rhosgobel yet so this is only the third LOTR expansion I’ve experienced so far.  But I can categorically state that it is by far the best scenario yet, including the core set scenarios.  I didn’t think I’d immediately like a scenario that threatens to be more difficult than Dol Guldur, particularly because Dol Guldur is so badly scaled for solo play.  But Massing actually scales nicely and remains challenging (but not impossible) to any number of players.

‘Massing at Osgiliath’ is oozing with more theme and theme-integrated mechanics than ever before.  The set up is terrifying: the heroes stumble upon the outrider scouts from an orc horde which is ‘doing something’ at ‘a certain city’, as the title implies.  This is brilliantly represented by a starting layout that will have you quaking: 3 enemies PER PLAYER (that’s one for each Hero).  Then there’s the uber boss Witch Lord sitting just out of the play area watching you and chuckling at your pathetic efforts the whole time.


As the quest begins, whilst you’re fumbling to get your bearings, draw your cards and drop your resources into play these Scouts start engaging you because two thirds of them have seriously low threat levels.  And if you don’t deal with them quickly you’ll be doomed before you know it.

There are the powerful Wolves from Mordor which you will need to feed weak allies to, just to get them out of your hair - they’ll then rip your Ally to shreds and scuttle back into the encounter deck.  But if you try and defend against them they’re so strong (Attack 4) they’ll start earnestly ripping your Heroes apart and spreading wounds across your table like they’re going out of fashion. 

Then you have the Snaga Scouts which you think you can ignore because they look pretty weak.  So you’ll maybe let a few through your ranks undefended?  Well, then you’ll have some killer Shadow Effects coming your way too!  And this deck doesn’t scrimp on nasty shadow effects.

Finally (for the opening setup at least) you’ve got the Wainriders.  You’ll be tempted to leave these guys to deal with later on whilst you get your footing, but that can be disastrous too.  Their threat increasing attack is more easily handled early on rather than later, when your threat will already be growing.  I’ve even been known to play a Gandalf just to take one of these ostensibly ‘weak’ bad boys out.

That’s before you even get started on the rest of the encounter deck.  And whilst some of the FOUR (count em) stages place restrictions on you – e.g. reducing the play of Ally cards - and are indeed very difficult, it never feels unfair (unlike the poor schmuck who has to lose a Hero for half the game in Dol Guldur).

As you’re racing back to the safety of Gondor the orcs pursue you across the Anduin and you’ll be relying on the help of the few surviving Ithilien Rangers spotted about the city.  This is one of my favourite LOTR game mechanics yet: not only do they buck the Hero card trend for Allies and emerge from the encounter deck, but they can also come into play through a great shadow effect.  If drawn as a Shadow card an Ithilien Ranger will open fire from one of the ruined towers of Osgiliath and deal 2 damage to your attacking Enemy.  Then if you have a Hero to lead them (by exhausting) they will come to join you.

The Rangers are a must-have when it comes to crossing the Anduin.  By this point, the orc horde is hot on your heels, the staging area is filling up with Captains, Scouts and devastating Locations and you’re struggling to get cards into play fast enough.  So, when you get to the river crossing some brave souls are gonna have to stay behind to guard your escape.  Cue the Rangers...  if you have them.  If you don’t have the Rangers with you by this point, you’re in trouble because you’ll need to sacrifice a Hero just to quest your way over the great river.


Once you reach the other side of the river things really go pear shaped!  You’ll have an open run across the Pelennor Fields - with the largest Progress requirement for this scenario – and none other than the Witch King himself on your tail.  Finding a way to keep him actually engaged with you is vital otherwise he will cause the stage threat to skyrocket.  Or if you’re feeling balls-out crazy you can try and take him down.  There’s not much more of a satisfying victory in the game so far if you can swing that.


As difficult as this scenario is, you can win through with a little luck and a lot of planning and strategy.  The pace of the scenario matches the frenetic nature of the flavour text beautifully and really lends the sense of hopelessness that falls upon Gondor during this time in Middle Earth’s history.  You’re not even fighting to win - even if you are victorious you’ve only managed to stay alive a little longer and warn Gondor...


I really hope that at least one of the first cycle of Mirkwood expansion packs can match up to how much fun this scenario is, and for the record I think I prefer getting cool new encounter decks to getting a handful of new hero cards.


The Lord of the Rings: The Card Game - Conflict at the Carrock Review

Disappointing solo single deck experience


'Conflict at the Carrock' arrived from Maelstrom Games last night. Anyone who has ordered this from them along with at least one other item will want to split their order as it is their policy to send out everything at once. For me this meant I’d apparently have to wait five months before they sent me any of the LOTR expansion packs. Good job I phoned them.

Or was it?

I’m not trying to rip on this game – I love it, I’m an addict. Anyone who’s read my session reports or seen my fan scenarios will attest to that. So perhaps when it fails it fails harder because my expectations are so much higher. And as much as I advocate the game, in the interest of sharing, and to help manage expectations, well, here we go...

All in all this one makes for a very disappointing solo experience. That’s solo with a single deck by the way. I will probably only play this solo with two decks from now on.


First of all, as discussed elsewhere there are apparently only two stages in the scenario, the second stage just forgets to tell you that it’s over when you’ve won. Those of us who wanted a narrative resolution to the scenarios will be even more disappointed with this sense of “Was that it? Did I win?”

Secondly, some of the hero cards are perplexingly rubbish. “Great, this attachment gives me the ‘Rohan’ trait. Now what?” What’s next – an attachment with the ‘Boring’ trait?

“Cool ‘Born Aloft’ – now I can, um, give one of my enemies an... undefended attack...” Okay I'm being facetious here, and there are a couple of decent cards too to be fair. The Songs and Dunedain cards continue to provide their uses and Burning Brand makes Denethor redonculously tough.

As a huge fan of the art in this game so far I have to say I'm slightly less impressed with some of this set. The Bee locations are a bit garish and the trolls themselves look a bit lame, sort of cartoonish and unthreatening.


Then there’s Frodo. Well, to be honest I’m ambivalent about him. He’s not exactly rubbish, but he doesn’t seem to fill a role well because his damage absorption ability is only useful if you have major threat reduction on tap.

And finally, there’s the solo experience of the scenario itself...

I purposefully didn't look at any of the encounter cards to keep the "surprise" element going, which may or may not have been a mistake. So I set up the game, prepped my deck (Leadership/Lore/Spirit - Aragorn, Denethor, Eowyn) and started out. I built up my forces fairly slowly in stage 1, and even managed to get Old Grimbeorn on my side, which was quite exciting in itself - like bagging one of the Rangers in Massing at Osgiliath only even more awesomer. Once I had a good force going I went into stage 2 with 38 Threat...


In stage 2, four trolls are placed in the staging area and they engage with you at Threat level 34 or higher. One of the troll's card effects is "Raise your threat by 3 for each Troll you are engaged with."


So instant death for me and game over in a flash. Boo hoo, whatever, tons of others have already made this error – so I set up again and learnt from my mistake: I should have read the cards first.

Next game I stayed on stage 1 building my forces up. And then the semi- ridiculous 'Banks of Anduin' Location came in (goes to top of encounter deck “when it leaves play”). And with Denthor and Henemarth in play, since I knew what was coming every turn I'd just commit Eowyn to quest and build and build and build. Got my entire deck into play, with 3 Galadrim Greetings, 3 Sneak Attacks on Gandalf, 3 Stand and Fights on Gandalf, and 3 actual Gandalfs for massive threat reduction, and a threat level of about 14 when I finally moved on to stage 2.... The docile trolls didn’t stand a chance as I chopped them all to bits one by one.

Some might call that a perfect storm of cards or just good luck, I have to say it was really quite boring and it took a long time to play out, which I was determined to do even with the foregone conclusion that the game could not stop me from the moment the ‘Banks’ turned up.

Banks of Anduin is a suspicious card in solo play.

I already had to remove Will of the West from my games due to it being hugely over-powered. Now do I have to remove Gandalfs, Greetings, S&F, and Sneak Attacks too? Then would it swing the other way and become unwinnable??

Now, this was only a solo single deck play through, and the game already falters in catering for just one deck (see Dol Guldur) so hopefully I’ll get to see the scenario really shine with two or more players - particularly since the Banks card serves its purpose more readily in multiplayer games.

The idea of a ruck with 4 trolls seems like great fun and I really want to enjoy this scenario, particularly in light of how easy Hunt for Gollum turned out to be. And the cards provided will make for cool new scenarios too – I can’t wait to put Morris, Stuart and co into a different and more dynamic scenario. Luckily I have a multiplayer session lined up soon so fingers crossed I can report back later with better news on the multiplayer experience...


(EDIT - After numerous games I'm sorry to say it's also not great in multiplayer either.  Hopefully will be able to design a scenario that will make use of all those new Trolls soon...) 

Tuesday, September 06, 2011

Castle Ravenloft Painting Guide

Courtesy of Universal Head:

Castle Ravenloft Painting Guide | Games Paradise Online: "Castle Ravenloft Painting Guide"

'via Blog this'

Castle Ravenloft characters

October: Legend of Drizzt Board Game Preview


From the original article here:


October: Legend of Drizzt Board Game


Continuing the D&D Adventure System of boardgames (following Castle Ravenloft and Wrath of Ashardalon), players can now take on the role of the legendary drow ranger or one of his famous adventuring companions, battle fearsome foes, and win treasure and glory.
As far as these famed companions go, you'll be able to play as Catti-Brie (human archer), Regis (halfling rogue), Bruenor Battlehammer (dwarf fighter), Wulfar (human barbarian), and Athrogate (dwarf battleranger)—as well as Artemis Entreri (assassin) or Jarlaxle Baenre (drow mercenary). And of course, there's the option to play as dual-scimitar wielding Drizzt Do'urden:

For those of you familiar with past D&D Adventure System games, Legend of Drizzt plays just as similarly—except that the dungeon tiles represent the caverns filled with the monsters, traps, and tricks you'd expect in the dark corners of the Underdark. Various scenarios pit you against yochlols, mind flayers, Yvonnel Baenre the drow matron mother, Shimmergloom the shadow dragon, and Errtu the Balor—as well as Artemis and Jarlaxle (that's right, available as both members of your adventuring party or as your party's foes):

Monday, September 05, 2011

Living FAQ for Fantasy Quest

Living FAQ | Fantasy Quest | BoardGameGeek: "Living FAQ" 


'via Blog this'


I'll address any and all questions you might have about Fantasy Quest here, and they'll all be taken into consideration for clarifying the next rules rewrite. I'll try and keep this OP updated where possible with the latest content too. 


In this link are some of the questions you've been asking so far - and many thanks to everyone who has already contributed!

Thursday, September 01, 2011

FANTASY QUEST - First Impressions at La Taverne du Jeu

Premier aperçu de FANTASY QUEST - News - La Taverne du Jeu: "FANTASY QUEST"

Our friends over at La Taverne du Jeu have released this first ever preview of Sylvain Freour's Fantasy Quest build and I have to say it looks eye-wateringly awesome...