Hall or Nothing Productions Ltd

Thursday, May 05, 2011

Lord of the Rings: The Card Game - Two Deck Nightmare Musings


Two Deck Nightmare Musings

MUSINGS

Deck builders beware: I only have one core set, I don’t intend to buy more - I did contemplate it at one low point, but luckily I can wait for the expansions - and I haven’t yet mixed up any dual sphere decks, just mono spheres here.  You want more spheres per player?  Move along, these are not the woirds you’re looking for.  I’m not sure it’s even necessary, although it may be great fun for you.  I just wanted a game playable out of the box.  But how to play it out of the box?

It struck me some days ago that beating all 3 scenarios solo with just one mono deck was technically just shy of utterly impossible.  Scenario 1 ‘Mirkwood’ is eminently playable with one deck, and, with luck, you can beat it with any mono sphere deck included in the box.  Scenario 2 ‘Anduin’ is much trickier, and despite hearing reports to the contrary, after 6 plays against it with one mono deck I’ve yet to succeed.  Scenario 3 ‘Dol Guldur’ is redonculous with just one deck.  You start out crippled, with one hero gagged and bound.  With four players and 12 heroes, you’d barely notice or feel this effect between you, but with one player and three heroes?  That’s it.  Pretty much game over before you start.

To begin with, I was reticent about playing solo with two decks, in much the same way as I originally didn’t like being forced to play with 3 heroes (which is why I created a solo hero scenario).  Sure, you could play with less heroes, but you’ll lose.  And not in a ‘hey, that was close’ manner.  No.  Instead, you’ll be bent over your table and have the encounter deck apply a wicked series of paper cuts to your buttocks, whilst all the while listening to it whisper “Two decks, two decks, to Mordor we will take you”.  That actually happened to me once.

But, even though it’s only really implied rather than suggested, for some reason I was sticking to this whole one mono deck thing.  And it got quite frustrating.  Yet whenever I played with a friend we would have much more luck, and progress much further.  Reason being: the player scaling for the base scenarios in this game is not actually that great.  And that’s coming from, ostensibly, a fanboy.

Mirkwood starts you out with 2 encounters.  Not 2 per player, just 2.
Anduin starts you out with 1 encounter per player...  Plus 1 Hill Troll.  Not ½ a troll per player.
Dol Guldur starts you with 1 less hero.  Again, not 1 less hero per player...

You see the issue here: it’s not just ‘more challenging’, it’s imbalanced.

But, hey, it’s still a great game – I just want to play it and have at least a chance of winning, right?  So after playing through all 3 quests in ‘regular mode’ many times with or without a friend but always with two decks (btw: two decks in solo play is easier than I expected, I just put the first player marker on the appropriate hero deck to remind me to move it each turn), Scenario 3 remained thoroughly and totally unbeatable.  Which is when I started playing nightmare mode...


SESSION

There are apparently different interpretations of nightmare mode.  Some argue that you have to discard any allies or attachments you have in play between scenarios to make it harder.  I see no good argument for this thinking, so clearly these folk are fans of Leopold Ritter von Sacher-MasochThe game says don’t reset the decks, wounds, etc, so I just stack all 9 scenario quest cards on top of each other and play it as one big scenario.  Which I’m pretty sure is the intent.

In any case it provided for a heart-pounding experience that left me lying awake replaying the scenarios in my head.  Like when you fire up Resident Evil 5: Mercenaries Mode on the PS3 for a quick round before bed, and before you know it, the clock says 3am, and you remember it’s a week night, and you have to be up in the morning for work and it’s your turn to feed the baby and so stand up in a sudden sobering panic and spill cold beer all over myself.

Anywho.

Combining the combat abilities of Tactics (basic game, 1 core set, mono sphere) with the questing skills of Spirit (again: basic game only, 1 core set, mono sphere) and Gandalf in each I had my heroes set off, or ‘venture forth’ if you’re a fan of Baldur’s Gate...

Making steady progression through Mirkwood, the synergy came nicely into play of Eowyn exploring, Eleanor hanging back to deal with emerging treachery and Dunhere assassinating anything foolish enough to remain in the staging area.  On the other side of the table, Thalin got stuck into the questing and also got his axe stuck into anything and everything emerging from the encounter deck, Legolas nipped back and forth across the table murdering things wherever possible and enabling us to nip more quickly through the forests, whilst Gimli endeavoured to get beaten up and thus, angrier, wherever he could.

Lucking out, I found Beorn’s path, so Ungoliant’s Spawn reclined in its lair biding its time and letting us run safely through to the River Anduin with 59VP.  And after guiding us down his aforementioned path Beorn actually decided to join in the quest.  Helping to tackle the pesky Hill Troll he quickly proved his worth in spades by soaking up damage and threat from the troll on the one turn and delivering some seriously angry killing skills on the next turn, helping Gimli to bring the gigantic moron down to its knees.  As the poor Troll breathed its last, Legolas jumped on its back with a “huzzah!” and shot an arrow into the top of its head to claim the kill (and bag us some more progress).  Gimli and Beorn shared a look as the elf preened and pranced.

The river journey proved advantageous in some respects as the emergent band of Lorien Guides and Northern Trackers gave good directions and allowed us to avoid the more menacing locations.  And the angry, battle-hardened Tactics team stepped off the boat occasionally (or flaunted a showy volley of arrows), slaughtering orcs and spiders where they could.  The encounter deck kept throwing up all kinds of challenges and any occasion where I dared, or needed, to commit Eleanor to questing came with a guaranteed Treachery card that would batter my forces.

Upon berthing the boats, our heroes were beset on all sides by vicious orcs and spiders and a bloody battle ensued.  Whilst the Spirit deck kept a handle on the Threat track with help from Gandalf and the Galadrim (and sparing a thought for the Tactics deck where possible), Tactics found themselves flailing, and punished by Threat-raising Treachery and Shadow events.  Although the battle on the shore was eventually won, the Tactics deck limped to Dol Guldur with 45 Threat and very few playable turns ahead of them.  Spirit was at a respectable 24 Threat.  Pretty much every character was wounded, and some were collecting their injuries like stamps/pokemoncards/insertothercollectibleitemhere along with their 69VP.

Gimli was abducted and the heroes rushed into the dungeons to find him quickly, with as many characters questing as I could possibly manage.  A somewhat innocuous looking Orc Jailor put up what initially looked like a meagre defence against the combined might of Legolas and Beorn.  And then I drew the dreaded Hummerhorns as a Shadow Effect.  “Deal 1 damage to each character the defending player controls.”  I counted up the characters with only 1 hit point remaining:

Everyone but Eowyn.

It was a bloodbath.  Even if I hadn’t counted myself as the same player for both decks, the Tactics deck hit 50 Threat that turn and the battered and broken Spirit team simply could not have hobbled past the first stage of the final quest.

Bleeding out slowly as their enemies gathered around to watch them die, Dunhere and Eleanor looked at each other in despair.
“Where’s Eowyn?”
“I think she made a run for it.”
“Bitch.”
“Urgh.”

It was over.


Until the next day when I set out with the same setup!

This time I had slightly better luck with the card draws but also focussed heavily on keeping Threat down to give my heroes breathing room should they actually reach Dol Guldur.  With Beorn making a welcome appearance in the second turn of the game I was off to a rollicking start.  Quickly racking up kills and blasting through scenario 1, Beorn became essential to my war strategy and I was loathe to put 3 wound tokens on him from the first Anduin River Hill Troll fairly early on.  Readying myself to use his special mega-attack ability and wash him back into the deck clean of wounds, I actually ended up keeping the poor wounded giant of a man with us the whole time.

Choosing between playing down multiple low cost allies and attachments or saving up for tougher allies like the Tracker (or Beorn) and Gandalf – or making Gandalf Stand And Fight – I erred towards bringing in the big guns as soon as possible.  And they’d often pave the way for the little guys later on.

Gondorian Spearmen won my respect anew, especially when three of them Stand Together and inflict 3 damage on one attacking creature.

I hung onto certain counter Event cards for dear life, living in fear of the dreaded Hummerhorns, for example.

By the time we reached Dol Guldur, 2 Hill Trolls and a Marsh Adder had fallen, the Trackers and Guides were tearing through locations, and I’d accrued a respectable war party of Gondorians.  Gimli was taken captive (again: lazy, workshy git) and Thalin died at the first stage.  Undaunted by this dreadful turn of events I quested like crazy to get through to the second stage and free Gimli, with Eowyn taking on the Objective card that stops you from attacking/defending: Gandalf’s Map.

My tenacity paid off and we made it through to free Gimli.  And then, whether by Fortune Or Fate, Thalin miraculously returned to the battle from the dead, accompanied by cheers from the gathered forces of good...

...  Only to be webbed by a gigantic spider on the next turn and taken out of action for the rest of the game.

Before long the Nazgul of Dol Guldur was upon us and what had once looked like an army of Rangers and Gondorians was quickly ripped to pieces.  Staggering over the bodies of their fellow dead, Legolas, Gimli and Beorn stepped up to face off with the Dark Rider, whilst Eowyn literally dragged Dunhere and Eleanor through the dungeons to desperately try and find the exit.  As they turned down a dank, spider filled tunnel, Eowyn spotted the light of day filtering through from the exit.  Framed by a halo of daylight, Gandalf stood at the opening, spurring them on.

Sacrificing himself to the malevolence of the Nazgul, Gandalf generously allowed the Tactics warriors to descend upon the doomed Ringwraith and show the blasted thing that sometimes it’s better to give than to receive.  A beating.

Orcs swarmed the caverns as the Nazgul squealed and expired, and the heroes made a desperate break for the exit, bagging the final couple of progress tokens needed to get us all out the door and into the daylight.

32 Threat on the Spirit deck + 4 Wounds (for 36) and 43 Threat on the Tactics deck + 10 Wounds, mostly on a plated Gimli (for 53), minus 17 points for 1 Marsh Adder, 2 Hill Trolls and 2 Gladden Fields netted me a final score of 72.


Just.  Epic.


Next I’m gonna play through my own series of Scenarios in Nightmare mode, maybe with Lore + Leadership this time...

Phew, thanks for reading if you did!

Wednesday, May 04, 2011

The Lord of the Rings: The Card Game - printable scenarios

EDIT 13th June 2011 - Prologues and Epilogues added, format updated...

EDIT 5th October 2011:


Courtesy of BGG user GeckoTH all of my scenarios are now available in hi res format and ready for download here:


These have been requested a few times now so here they are in print format, 8 cards to a page:

SCENARIO 1: THE OLD FOREST


SCENARIO 2: THE LOST ROAD


SCENARIO 3: FORGOTTEN RUINS


SCENARIO 4: ELVEN ASSEMBLY


SCENARIO 5: UNGOLIANT'S LAIR


Lord of the Rings: The Card Game Scenario 3 - Forgotten Ruins


Courtesy of BGG user GeckoTH all of my scenarios are now available in hi res format and ready for download here:

http://www.boardgamegeek.com/filepage/66659/ninjadorgs-lotr-lcg-scenarios


Links to my four scenarios:

Lord of the Rings: The Card Game Scenario 1 - The Old Forest


Lord of the Rings: The Card Game Scenario 2 - The Lost Road


Lord of the Rings: The Card Game Scenario 3 - Forgotten Ruins


Lord of the Rings: The Card Game Scenario 4 - The Elven Assembly:


I tried to design this scenario with a mix of cards that we've not seen much yet (because some are particular to quests 2 or 3), but obviously the orcs remain ubiquitous.


Difficulty level = 5

The gathering minions of Mirkwood are summoning an ancient evil that rests beneath the land biding its time and plotting its return.


Okay, folks here it is, scenario 3 (I think this will be the last one from me until the expansions are out):


Sunday, April 24, 2011

Lord of the Rings: The Card Game Scenario 2 - The Lost Road


Courtesy of BGG user GeckoTH all of my scenarios are now available in hi res format and ready for download here:


Links to my four scenarios:

Lord of the Rings: The Card Game Scenario 1 - The Old Forest


Lord of the Rings: The Card Game Scenario 2 - The Lost Road


Lord of the Rings: The Card Game Scenario 3 - Forgotten Ruins


Lord of the Rings: The Card Game Scenario 4 - The Elven Assembly:


I tried to design a scenario where you could use just one hero (an option offered in the rules but not backed up by the difficulty of the quests included in the game) so here's what I came up with:


Difficulty level = 3

The lands are beset by evil, and murmurings of a darkness growing in Mirkwood are rife across the land.  Towns and cities tighten their borders, and information blends with rumour as fear rises.  With resources and manpower stretched to capacity, you alone are sent to investigate the dark happenings in Mirkwood and bring back your findings to the Council.

The Lost Road is an adventure for one solo hero.  The encounter deck is built with all the cards from the following encounter sets: Dol Guldur Orcs, Passage Through Mirkwood, and Spiders of Mirkwood.


FAQ


The (Lost Road) set-up also notes, that players only play one sphere of influence, but it is not clear, if NinjaDorg is commenting to the players or set a rule into effect. I could have Aragorn in play with Celebrian's Stone, allowing him to play spirit cards. I am not sure, if the scenario allows me to build that deck.


The idea is you are not allowed to use any cards from more than one sphere. So, using your example, no Spirit cards for Aragorn, but Gandalf is allowed.


Every other turn, after the first; is that the first and second, then skip the third – or is it the first, skip the second?


I think you played The Lost Road’s staging correctly. “Every other turn” means after setting up the game you do the following:

Take one turn, but don’t Stage.
Take second turn, and Stage.
Repeat.


Finally, I think “Will of the West” should be removed from all decks before any game begins. (And that applies to the core scenarios too!)

Friday, April 22, 2011

Lord of the Rings: The Card Game Scenario 1 - The Old Forest


Courtesy of BGG user GeckoTH all of my scenarios are now available in hi res format and ready for download here:


Links to my four scenarios:

Lord of the Rings: The Card Game Scenario 1 - The Old Forest


Lord of the Rings: The Card Game Scenario 2 - The Lost Road


Lord of the Rings: The Card Game Scenario 3 - Forgotten Ruins


Lord of the Rings: The Card Game Scenario 4 - The Elven Assembly:


The Old Forest

Difficulty level = 5

The dangers of Mirkwood have been growing, people have been going missing, and rumours of Orc patrols emerging from the woods have been filling the locals with panic and dread.  You have banded together to patrol the borders of Mirkwood and see if you can ascertain the nature of the threat growing in the dark woods.

The Old Forest encounter deck is built with all the cards from the following encounter sets: Dol Guldur Orcs, Wilderlands, Passage Through Mirkwood, and Spiders of Mirkwood.


EDIT - Updated scenario name from Shadows of Mirkwood to The Old Forest because of FFG's forthcoming expansion of the same name!


Thursday, April 21, 2011

The Lord of the Rings: The Living Card Game Solo Play


Mono Deck Solo Play – 8 games vs Mirkwood scenario!

How does it play solo?

For my first session report with another player check here:

http://www.boardgamegeek.com/thread/644380/first-impressions...

Okay so I pretty much tore into this game with a massive solo session last night and it was a bit of a rollercoaster experience, with some serious playability concerns growing at first, which luckily were soon smashed.

For speed and ease of play I dispensed with deck-building and dual sphere-ing and whatnot and just took the decks as they come. I wanted to see how each of them played, and to keep it a fair test I stuck to the same basic Passage Through Mirkwood scenario. I also didn’t want to ruin too many of the surprises and cards for when I play the other scenarios with mates.

Choosing the Leadership team first - my thematic favourite - I set up and set off. Having played this deck already I thought the familiarity would help. This was wrong. One mono-sphere deck against the game scales well because you only draw one encounter card during the Quest phase instead of two cards (for two players). But you still start with the rather nasty Forest Spider and distracting Old Forest Road in play no matter how many players there are. And they’re both fairly tricky to deal with.

Game 1 (Leadership): Given the fairly low willpower of this group I concentrated as much as I could on questing and started throwing low cost allies into the path of incoming enemies like the very first Forest Spider. Rapidly drawing a few spiders I soon found myself overwhelmed. Spiders are especially nasty because their low threat value means they’re mostly going to engage you straight away, for example you can’t just let them sit in the staging area whilst you sneak past. My allies were being slaughtered whilst my heroes were off questing and trying to get past any locations thrown my way. Progress on the quest was agonisingly slow and the Shadow effect cards were wounding my heroes even as their allies were dying. It wasn’t long before my wounds were racking up, and the heroes had to return from questing to defend against the spider hordes. By this time there were too many of them and my badly injured heroes started to fall, one by one. When you start losing heroes it really needs to be the endgame, because with less heroes your resources are reduced but your threat track remains high (as opposed to starting with less heroes in exchange for a lower starting threat), you have less characters to defend with and you’re going to have less characters coming in to support you. With just 5 Progress tokens on the first quest card I soon found myself buckling to the will of Sauron.

Game 2 (Leadership): Even more determined I reshuffled and set off, once again concentrating all my efforts on questing with the heroes and throwing minions up as defence. Generally the Leadership allies are quite weak and squishy so throwing them into spider mouths only buys you an extra turn or so against each enemy. Once again the spiders came in thick and fast, and even the sneaky orcses had some nasty When Revealed: effects such as throwing damage at my questing heroes. Once again, the enemies got out of control and no matter how much I tried to quest, the high threat of staged monsters and locations prevented my progress whilst ‘back home’ the Gondorian warriors and their mates were being butchered. I eventually reached the same situation as last game, having to pull back my wounded heroes for defence and watching my threat meter rocket because I couldn’t make any Quest progress. Once again my team were defeated with a mere 3 Progress tokens on Stage 1.

Game 3 (Leadership): This time I was determined to deal with threats more efficiently and only quest where possible, although still pretty much leaving Theodred in a permanently exhausted questing state to get his resource pool growing. Slaying the enemies as and when they appeared and tactically using allies for group attacks instead of just as human shields started to pay off and I started seeing enemy encounter cards die and hit the discard pile more often, which was more satisfying but still very difficult. I actually made some good progress on the first quest stage and even reached the second quest stage, but my threat was high because of my poor questing efforts. And then Ungoliant’s Spawn came into play, an extremely tough ‘boss’ monster, which should be worth some Victory Points at least (but isn’t). Not realising the danger this thing posed to me I carried on regardless and this thing engaged me. It’s massive 9 hit points were insurmountable given my drained resources and wounded heroes and it was the death of me. As it ate my heroes one by one, chewing their bones and grinning at me, I genuinely began to despair that this game is BROKEN and UNWINNABLE with one player. It was like Space Hulk: Death Angel for masochists. Huffing in frustration I reshuffled, telling myself I’d give this team one more go before moving onto a different sphere deck. Although even then I was very dubious as I’d heard on BGG that the other decks were weaker and would fair even worse, especially in solo mono deck play. In summary: Leadership group died Vs Ungoliant’s Spawn.

Game 4 (Leadership): Tackling enemies as soon as possible and travelling all the time to take location threats out of the staging area I began to use heroes for defence more, allowing my weaker allies a turn or two to get their bearings and join the battle instead of simply chucking them onto orc spears. My own area began to rival the staging area for a change and before long my growing group of allies started to look more like a war party. Progress on the quests was slow but steady and I made my way carefully right the way through to the 3rd and final quest stage. Drawing randomly I reached Beorn's path with more than just a sigh of relief. Somehow, putting down 10 progress tokens seemed eminently more achievable than slaying the Ungoliant’s Spawn that had destroyed me last game. I just had to survive without the bloody thing showing up and ruining my plans (since you can’t win if it’s in play). My stalwart allies launched themselves mercilessly at the orcs, goblins and spiders that were emerging from the forests and their tenacity paid off. With an impressive 3 heroes and 5 allies still in play I reached the end stage - it could be one of two options: a long journey down Beorn’s Path or a face-off with the Ungoliant Spawn boss. Luckily I got Beorn’s path, beat my way down it, and racked up a fairly impressive score of 40 points (although it’s the lower the better for those unfamiliar with the scoring system). My first solo victory, huzzah!

Game 5 (Tactics): Time to bring in the fighting team. Tactics is all about taking cheques and kicking arse, which means questing is tricky but killing baddies is easier. In theory. Holding Gimli back for defence and Legolas back for assassinations I sent Thalin questing to try and murder things coming out of the encounter deck, as is his wont. It didn’t work out. Making little progress on the quests had my threat track going up, and due to some agonising decisions over what cards to play I ended up with some less useful attachments in play and limited resources whilst the monsters kept coming. I managed to place 1 Progress token on stage 1 before the end came to my heroes, in a bad way. Could this deck be worse than Leadership? Was my single solo victory a fluke??

Game 6 (Tactics): I regrouped, reshuffled and went back in. Carefully managing the steady stream of beasties I gave Legolas an early Gondolin blade and use his assassination techniques to put progress down on the quests and locations, almost coming to rely on this for my progress because of the low collective willpower of the Tactics group. Questing resulted in damage control rather than significant progress, so Legolas killing things seems key to keeping things moving with this deck. Bringing in some help early on I once again started being previous about my allies and keeping them around where I could. I also drew my Gandalf card early and kept him in hand, mindful of the possibility that Ungoliant’s Spawn could turn up any minute. With 2 brave allies backing me up I accrued my resources and threaded my way through to the final stage: a showdown with U Know Who Spawn. Worrying that perhaps the only way to win this scenario with a mono deck was to beat Beorn’s Path I genuinely started to consider removing this Ungoliant Spawn showdown card from the quest deck. Ploughing on I quickly brought Gandalf in who fired off a magical attack and caused the Ungodly Spawn no small amount of ball ache. I set up a trap for the nasty pastie: my brave Gondorian spearman steadied his spear and stood before the gigantic spider. It rushed down from the trees and swallowed him whole, whereupon my entire party set upon it hacking with their swords and axes. With a shrieking spasm the beast went down and the Tactics team won with 55VP.

Game 7 (Lore): Bringing a whole new level of tactics the Lore deck works entirely differently from the previous two decks. You get massive access to healing and tons of extra card drawing. Denethor is my new favourite hero too! With his huge 3 defence he can pretty much hold off any enemy. He also has an amazing ability to look at the encounter deck card, which would prove absolutely crucial. In doing so you’re able to plan your entire questing activities in advance and allow for considered defending and, once you’ve got a few allies in play too, your counter attacks to thin the ranks of enemies. Allies were quick to come by in this game and soon I had an army of fairly weak characters but with cool abilities and a formidable amount of willpower between them. And then, to my delight, Henamarth Riversong showed up. This guy is amazing and can possibly win games for you. Like Denethor he can look at the top card of the encounter deck, allowing you to hold back Denethor for his awesome Defence skills. Soon I had traps set for every enemy coming in. Locations were posing little threat and any damage my team received was quickly healed by my army of hippies. When Ungoliant’s Spawn showed up I had plenty of fodder to chuck in the way, but I didn’t need to. After one attack it was trapped in its own webs, my army descended upon the wretched beast and slew it with an unnatural fervour. With the help of a ton of allies I racked up a 57VP win.

Game 8 (Spirit): Eowyn’s unmatched Questing ability brought huge amounts of Progress to the quest deck whilst Eleanor kept the treachery cards in check. The Galadhrim's Greeting kept my threat so low and my team so sneaky that most enemies couldn’t engage me. So Dunhere’s ability to target enemies in the staging area meant that from the very start, even tough enemies were taking damage and eventually, if ever, coming into engage me in a drastically weakened state, making them much easier to pick off. So, in my final turn I marched into the final stage with 2 allies and Gandalf in tow. Ungoliant’s Spawn didn’t stand a chance. Spirit group: Won vs Ungoliant Spawn with 32VP.


Summary thoughts


Random Encounter and Shadow card draw is definitely a huge factor in this game, which may not appeal to some, but you are armed with a fine array of tactical options with which to tackle incoming obstacles and enemies. The decks individually work beautifully and elegantly, and once I began to get a grasp on the tactics of each one, the game played more smoothly and easily. Bearing in mind of course this is only the first introductory quest, I fully expect the later scenarios to rise significantly in difficulty. Initial fears that the decks were ‘unfinished’ or ‘incomplete’ were utterly laid to rest, as each hero sphere proved formidable in its own unique manner. But most of all, the possibilities for synergies with other players using different decks in multiplayer games were extremely tantalising. Got a session planned with Mmzomba for tonight. Cannae wait...


PS. Have you seen the art? Did I mention the art yet? It’s flipping brilliant!

Wednesday, April 20, 2011

The Lord of the Rings: The Card Game First Impressions


First impressions: seeing red... ...wound counters everywhere


Preface

I love fantasy games, and Tolkien started it all for me. Blame my mum for reading me The Hobbit before bedtime. With huge anticipation I’ve been following the boards and updates on this game for what seems like years, and despite all my intentions of holding off until payday, or getting a good deal online, the game came out in England yesterday, arrived at my FLGS at 1pm and I picked it up about 10 minutes later.

I’m not a deck-builder, I played Magic back in the day but never had a real ‘system’ for it beyond, say, 1 land per 2 spells. And I was always more interested in having a themed deck of goblins or elves than killer decks of pure lightning/fireballs/whatever. I play Resident Evil The Card Game as tactically as I can but rarely have an uber strategy going in. And my gamer mates are even less concerned about ‘honing’ a deck to make it tournament ready/unbeatable, we’re all more about the experience and narrative, if any. So my approach to LOTR the LCG is very much more about the theme, gameplay and experience. I will not, for example, be picking up multiple copies of the base game, although I may pick up some expansions if they prove to be as interesting as the base game. Which brings us to...

First play

I read the rules online at work in the afternoon so I’d be ready for a game with my buddy in the evening. I’d seen all the great FFG videos going through the gameplay, etc. so I thought I had a pretty good grasp on it all. The rules are pretty comprehensive and especially laudable compared to FFG’s usual fair. If I had to criticise them at all, personally I could’ve done with more sentences in bold highlighting the key elements. “Why even bother engaging enemies? Because it takes their threat out of the staging area, dummy.” But there were still some sticking points and I had to reference the rulebook a few times during play. e.g. what happens to engaged enemies at the end of the round? They stay engaged with you ‘forever’ apparently, removing their Threat from the staging area. I thought I’d read it somewhere but couldn’t find it in the rules for the life of me.

Usually I play any game solo first to grasp the rules before introducing it to mates, but I didn’t have the time yesterday and was too eager to wait. So things will be a lot smoother with more plays obviously, and it was getting late, but our first game took close to two hours as we analysed all the tactical possibilities, discussed our hands, admired the artwork, read the quotes, dissected the abstract nature of the goal - you need to put X footprints on here to get to there - and generally panicked as the game threw adversaries and obstacles at us.

By the way, opening the box was a laugh; clearly it’s packaged for the gazillion expansions that are waiting in the wings. You get a couple of hundred cards in tiny ziplock bags, with two sheets of cardboard chits - resources, wounds and progress tokens - that look good and do their job adequately. But man, that box is hungry! It’s completely empty. You’re paying for acres of blank space. Still, if it works out nice, maybe I’ll be thankful of all that space to bundle in all the aforementioned expansions...

My mate, KG, took the Tactics group Thalin, Gimli and Legolas because he guessed – rightly - that I’d want Aragorn’s Leadership team, with Gloin and Theodred.

We set up the game as instructed and I got a little confused as to why there were two “3A” quest cards for the basic Passage Through Mirkwood scenario. Turns out you have to read the “2A” quest card to find out why, so a good few minutes spent finding that out. Then we drew our 6 cards each and at this point I should probably take time out to mention the artwork. It is beautiful. The promise of the various preview cards’ art has been fulfilled and any LOTR aficionado should be more than happy. The omnipresent androgynous appearance of the elves may cause awkward feelings for those accustomed to their fantasy women in chainmail bras, but personally I reckon this is one of, if not the most beautifully illustrated game I’ve played.

So we placed our resources and set off on our quest. I falteringly articulated to KG that we had to attack the quest with our heroes’ willpower and it would throw bad stuff at us to try and beat us. So we’d need big sticks to hit things with. He quickly tooled up his heroes with some nifty Blades and axes, whilst I summoned a few unnamed red-shirt ensigns to feed to whatever nasty critters came our way.

We went Questing with 4 heroes: Aragorn because he can immediately ready with 1 resource, almost as though he never went questing at all, Theodred because he can give Aragorn a resource to do that, Thalin because he kicks anything coming out of the encounter deck as it goes past him (deals 1 damage to revealed monsters), and Gloin because I had my ensigns in reserve for defence duties anyway. But even with 4 guys we were thrown back because of new monsters (Orcs and Spiders) coming out of the forest. Not only had we made no progress but our Threat went up by 1 each too. Not a great start.

A forest spider sits in the staging area before the game starts in this basic scenario, and it’s threat was low enough to engage me straight away. KG immediately made assumptions and questions were raised.

“So you compare your fight with its defence?”
“No, it’s attacking me.”
“Oh, so you attack after it’s attacked you?”
“Well, possibly, but my guys are all tapped, I mean exhausted.”
“So you can’t attack it at all?”
“Erm, not if I want to defend, no.”


And thus a crucial discussion of the strategy came about, when to defend (every time!), when and how to attack or quest, etc.

Anywho, enemies were engaged, defenders allocated and shadow cards were drawn. Those shadow cards can be devastating! My first one dealt damage to all my questing/exhausted heroes and in the first turn there was blood everywhere. My nameless ensigns were quickly murderised whilst KG’s Tactics group dug in and defended themselves with some bruises and cuts. We tentatively approached the second round of the game with an alarming number of wound tokens littering our characters.

We continued summoning allies and weapons and my hand actually ran out after just a few turns. The Leadership group can quickly build resources, especially once Aragorn attained the Steward of Gondor title, netting him an extra two resources per turn. At which point KG wryly remarked “Aragorn is the Steward of Gondor? Is this supposed to be canon?”
“Yes,” I replied, “each game of this replaces everything that happened in the books. Chris Tolkien has his work cut out keeping up, bless him.”

We ploughed on through, throwing as much willpower at the quest as we could and taking some serious injuries in the bloody battles that followed.
The Forest Spider from the opening round stalked me the whole game (and survived uninjured!)
KG’s Gimli took a couple of hits and became a force of nature, slaughtering everything he came up against.
Thalin proved himself repeatedly by questing and damaging everything that came into play.
Aragorn had plenty of resources but I was rarely able to use him as a defender because of his wounds and fairly modest Defence.
Gloin is okay for taking a couple of hits but then his ability (gain 1 resource per wound) is pretty much used up.
Theodred basically spent the game allowing Aragorn to untap/ready himself.
Legolas was primed and ready to kill and had his own Gondolin Blade, but we drastically underused him, instead having to allocate him to KG’s Defenders.
On a side note, I really liked the Locations and the various effects (e.g. discard two cards) they had when you travelled to them, which we almost invariably did.

Slowly but surely we overcame the first quest card only to beat the second quest card in one round (IIRC you only need two Progress tokens on it for some reason). And randomly drawing the third quest card we went into the showdown with Ungoliant’s Spawn. Having read somewhere on BGG that one group drew this quest card and spent hours going through the deck trying to find him I was shocked to see that you immediately go through the encounter deck and its discard pile to place one Spider monster of your choice per player into the Staging area. Since Ungoliant’s Spawn is a Spider we dropped him right into play straight away, it didn’t seem to make any sense to do otherwise. Unless you wanted time to build your strength, but time is against you in this game. And by the time we reached this area I had 1 hit point left on each of my heroes and some seriously bloodied allies.

My haggard bunch didn’t stand a chance so we were relying on Gimli and his angry axes to finish off Ungoliant’s Spawn and win us the game. The spiders and orcs had multiplied and were swarming us. I engaged as many as I could to give KG that chance at killing the boss. Aragorn succumbed to his many wounds and fell.

“So this was before Fellowship of the Ring?”
“Yes, Aragorn died, little known fact.”


Our allies fell in swathes, all dying to orc blades and spider bites. Then Legolas and co rallied round to give Gimli his chance. After one devastating swing of Gimli’s axe, Ungoliant’s Spawn was badly wounded... but still alive. Calculating the number of enemies, the dearth of good guys, the wound tokens splattered about the place like stars on a bright night, we quickly realised there was no way we’d survive another turn. We couldn’t even afford to Quest, which meant our Threat tracks would start flying up.

Then, next round KG pulled Quick Strike from his deck. We puzzled over its words and meaning.

“Quick Strike
Type: Event
Sphere: Tactics Cost: 1
Action: Exhaust a character you control to immediately declare it as an attacker (and resolve its attack) against any eligible enemy target.”


Gimli exhausted to attack Ungoliant’s Spawn before it had the chance to act. It’s spidery body was sliced in twain and the victory horns sounded. Orcs and spiders scuttled away into the forests in fear. It was a hard fought and rather paltry victory. We calculated our score: 102, thanks to a dead Aragorn, a seriously wounded crowd of heroes, and escalated Threat tracks.

We both had a lot of fun, although I anticipate it being much more fun once we’ve got the turn order and fiddly rules down.

There are remnants of Space Hulk: Death Angel in this game, which is no bad thing, although I’m glad there’s no Random Dice of Doom in this one. The artwork is fantastic, the game-play seems well considered and although we had a couple of minor teething issues I’m sure other more hardcore gamers will pick it up easily. I’m going to reserve judgement and a full review until I’ve had a few more plays, but for now I’m really happy to finally own this damned thing after all these long years of waiting, and I can’t wait to play again!


Thursday, April 14, 2011

Descent: Journeys In The Dark - Full Solo/Coop Rules


Descent: Journeys Into The Dark Cooperative/Solo Rules


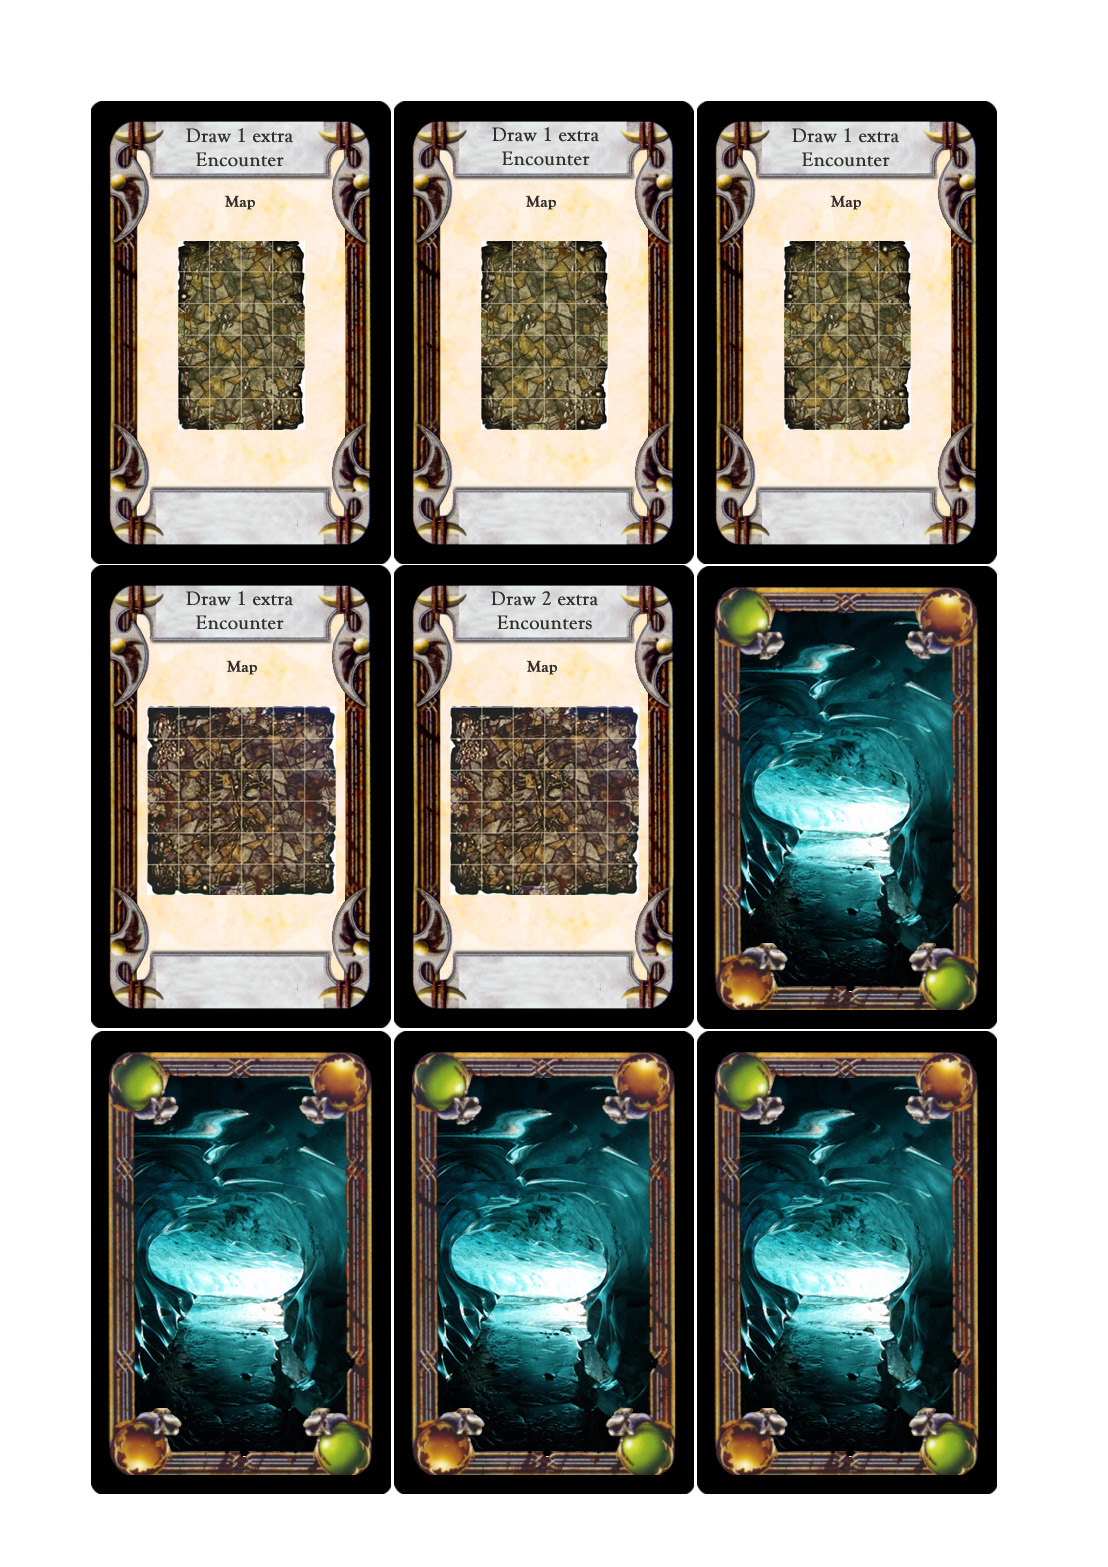
These are the Dungeon Encounter cards from my coop/solo Descent variant:


The card backs for the different levels of encounters:


This is the map deck and final set of encounters for coop/solo Decent:


The first one is the Map deck backs, if you print everything else once, you will need to print this one 3 times:
And this one once, like the others: