Hall or Nothing Productions Ltd

Tuesday, January 10, 2012

Boromir's Guide to Deck Construction, Part One

Fantasy Flight Games [News] - Boromir's Guide to Deck Construction, Part One:

'via Blog this'


“Believe not that in the land of Gondor the blood of Númenor is spent, nor all its pride and dignity forgotten. By our valour the wild folk of the East are still restrained, and the terror of Morgul kept at bay; and thus alone are peace and freedom maintained in the lands behind us, bulwark of the West.”
–Boromir, The Fellowship of the Ring
One of the reasons The Lord of the Rings: The Card Game has entertained so many fans and enjoyed a great deal of success is because it appeals to people across a range of player archetypes–Bilbo, Pippin, and Boromir alike. The game’s narrative structure makes it easy to find a story in every game. Because it’s a Living Card Game, novelty seekers can find new cards to try in their decks and new challenges to face with each monthly release, and enough of the scenarios and their enemies pose sufficient threat to challenge the hardcore Boromirs, who seek glory through conquest. In fact, some of us are still waiting for the combination of cards that will allow us to beat Escape from Dol Guldur solo with a measure of consistency.
The lone traveler’s journey
The game has also found a good measure of success due to its rich solitaire play, but while confronting the challenges of Middle-earth may lead to memorable game experiences, they can also frustrate players with less experience in games with deck construction. The Lord of the Rings: The Card Game is unique among these games in that players compete against the forces of Shadow, as controlled by an encounter deck and its artificial intelligence. Still, the encounter deck has its fair share of devious tricks and an arsenal of deadly weapons. Accordingly, it is no simple thing to master the encounter deck and succeed at your quests.
Now that the Khazad-dûm Expansion has arrived, players will face a whole host of new challenges, and some have already wondered how they will fare against the goblin hordes of Moria.
Today, then, we begin a three-part series of deck-building tutorials aimed at the new solo player, but one that should contain helpful information (and reminders) for players of all experience levels.
Sharpening your blade
There’s much to be said for the decisions you make while playing a game, but we begin any conversation about success in a card game by looking at the deck.
While players may find many different card combinations and ways to approach the challenges before them, there are a number of larger, universal concerns that touch upon deck-building in any game, including The Lord of the Rings: The Card Game. No matter the scenario you intend to conquer, you’ll want to consider how your deck may provide you with action advantage, card advantage, and resource acceleration. Additionally, every card designer at some point talks about “synergy,” and it’s important to be able to recognize whether or not your deck is filled with synergies between cards, or if it’s a combination of 50 cards all seeking to do their own thing. Meanwhile, each card game introduces its own game-specific concerns, and in The Lord of the Rings: The Card Game, it’s always worth trying to maintain as low a starting threat as possible, and including some means of reducing it should it start to rise.
Today, we’ll go into a bit more depth about action advantage and card advantage.
Action advantage
Action advantage refers, generally, to the idea that you can do more than your opponent each turn. In a head-to-head game, like A Game of Thrones: The Card Game, you might gain action advantage through “board control” or a stronger “board position.” In short, if you have more and stronger characters on the table than your opponent, you’re more likely to win challenges and the game. In The Lord of the Rings: The Card Game, your heroes are limited in what they can do by the number of times they can exhaust. Do you choose to quest with your hero, defend, attack, or exhaust to use a special ability? Each of these is an “action,” and the more actions you can take, the better.
Part of the solution is to include allies. A lot of allies. Many successful decks are almost half full of allies. Allies who can quest allow your heroes to attack or defend. Allies who block enemies for your heroes allow your heroes to quest or attack. Allies are good and help you gain action advantage.
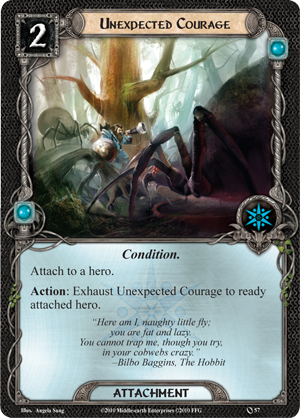
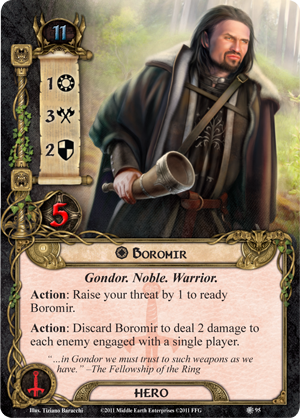
Another part of the solution is to build your deck around heroes who can ready themselves. Aragorn (Core Set, 1),Prince Imrahil (A Journey to Rhosgobel, 50), and Boromir (The Dead Marshes, 95) all come to your fellowship with built-in means of readying themselves. Still, there are other means of readying your heroes. Spirit heroes can help others find Unexpected Courage (Core Set, 57) or recruit a Westfold Horse-Breaker (The Hunt for Gollum, 6), and now, with the release of Khazad-dûm, your Dwarf heroes can get a boost from the Erebor Record Keeper (Khazad-dûm, 11).
Khazad-dûm introduces another card that clever players may use to find action advantage, Ever Onward (Khazad-dûm, 5). Certainly not the most glamorous of cards, Ever Onward may appear at first glance as though it’s merely a safety net. However, if you know you won’t fall deeper into threat by failing at your quest, Ever Onward can afford you a single turn in which for three-cost, all your characters remain ready to confront the enemies with which they are engaged, allowing you to withhold them from questing and assign them, instead, to defense and attack.
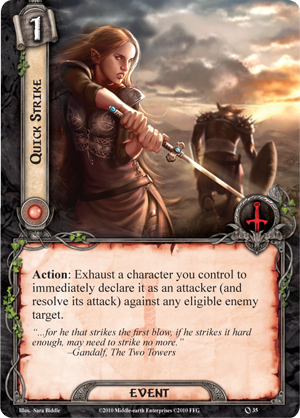
You can even find action advantage from cards that don’t provide you with extra actions but can let you “cheat” around the need to take actions. For example, Dúnhere (Core Set, 9) and Quick Strike (Core Set, 35) can let you attack enemies without first having to defend against them. They can save you the need to heal your characters later, prevent nasty shadow effects from resolving, and free you to focus on questing successfully.
Card advantage
Card advantage comes primarily in four forms. One is card draw. The more cards you can draw, the more options you hold in your hands. Another is subtler but no less effective, and that is the ability to do more with fewer cards. The final routes to card advantage are search and recursion.
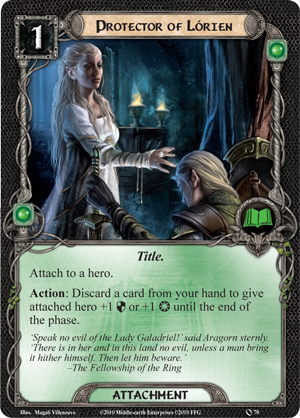
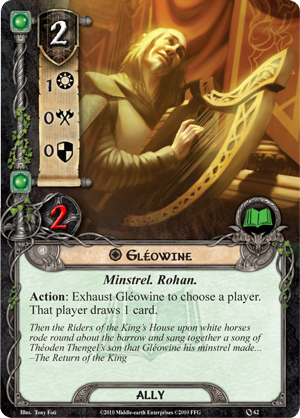
There are only a handful of cards in The Lord of the Rings: The Card Game that accelerate card draw, and the best of them are ubiquitous among top players. Beravor (Core Set, 12) almost always receives the first copy (or two, or three) of Unexpected Courage when she’s present in the party. While it may seem like a waste of an action to exhaust her to draw cards rather than quest, defend, or attack, nothing could be further from the truth. Card draw is the backbone of versatility. The more cards you hold in your hand, the likelier you’ll be able to find the perfect response to any threat. Furthermore, if another of your heroes is a Protector of Lórien (Core Set, 70), you can convert Beravor’s card draw directly into extra Willpower toward the quest. Bilbo (The Hunt for Gollum, 1), Gléowine (Core Set, 62), and Ancient Mathom (A Journey to Rhosgobel, 56) also provide excellent card draw, as can Gandalf (Core Set, 73), when he isn’t busy wounding enemies or lowering your threat.
Gandalf’s versatility serves as an excellent illustration of the second type of card advantage. Not only is he a powerful ally with tremendous benefits while questing, defending, or attacking, but he also offers your party the pick of his three exceptional abilities whenever he comes into play. At five cost, he’s not cheap, but the combination of Gandalf andSneak Attack (Core Set, 23), both reduces the wizard’s cost and allows you to play him more times. This combination offers classic card advantage. Dwalin (Khazad-dûm, 1) offers similar card advantage with his ability to reduce your threat each time he defeats an Orc. The mines of Moria are filled with Orcs, after all, and if you can boost his strength, Dwalin can both clear away your enemies and control your threat, saving you a card slot you might otherwise spend onThe Galadhrim’s Greeting (Core Set, 46).
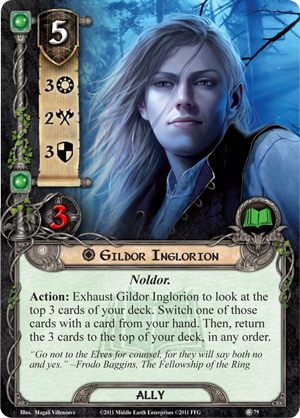
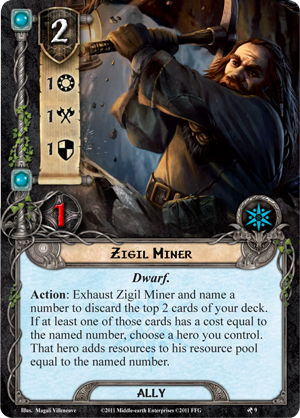
Finally, cards that search your deck, reorder the cards on top of your deck, or pull other cards out of your discard pile may not provide you with more options in your hand, but they may ensure you hold the right cards. Dwarven Tomb(Core Set, 53) can be as good as any Spirit card in your discard pile. Gildor Inglorion (The Hills of Emyn Muil, 79) is good not only for his excellent statistics; his ability to manipulate the top three cards of your deck can help you find the cards you need earlier than you would otherwise. Gildor’s search ability can also ensure the success of your Zigil Miner (Khazad-dûm, 9), leading to rapid resource acceleration… a fundamental of deck-building.

Saturday, January 07, 2012

Open Wide the Gates of Moria

Fantasy Flight Games [News] - Open Wide the Gates of Moria:

“It is now many years ago,” said Glóin, “that a shadow of disquiet fell upon our people. Whence it came we did not at first perceive. Words began to be whispered in secret: it was said that we were hemmed in a narrow place, and that greater wealth and splendour would be found in a wider world. Some spoke of Moria: the mighty works of our fathers that are called in our own tongue Khazad-dûm; and they declared that now at last we had the power and numbers to return.”
–J.R.R. Tolkien, The Fellowship of the Ring
The hour of the Dwarves has come. The Khazad-dûm Expansion for The Lord of the Rings: The Card Game is now on sale at your local retailer and online on our webstore. Pick up your copy today!
Great works begun there
Over time, the whispers of wealth and splendour touched Dwarven hearts and created stirrings within them that would not be quieted. Finally, Balin resolved to explore the mines of Moria and reclaim its treasures for the Dwarves. Ori, Oín, and many other Dwarves traveled with him, and the initial reports they sent back to the other Dwarves told of their entry and the great works they had begun. Then, however, the messages ceased. No word has arrived from Balin in many years.
In Khazad-dûm, a trio of thrilling scenarios take some of Middle-earth’s greatest heroes on daring adventures to Moria, where they search for Balin and his fledgling Dwarven colony.
Balin’s fate is of tremendous concern to the Dwarves, and they offer as much aid as they can in Khazad-dûm. You’ll find new attachments and events to bolster your Dwarves, along with newDwarf allies and two fantastic new Dwarf heroes. Each player card comes in triplicate, so a single copy of Khazad-dûm provides you with a complete play set of all its new cards.
Journeys in the dark
Your heroes’ search for Balin will lead them deep into the mines of Moria and its Dark corners and corridors. The subterranean world of Khazad-dûm is unlike anything your heroes faced in the Core Set or the Shadows of Mirkwoodcycle, and the expansion introduces nine new encounter sets to represent the mines’ new perils. From frightening new locations and treachery cards reflecting the physical dangers of travel through Moria to Orcs and Trolls, Khazad-dûm pushes the game forward with exciting new encounter themes and mechanics.
The wait for this highly anticipated expansion for The Lord of the Rings: The Card Game has finally come to an end, and the time has come to begin your journeys through Khazad-dûm.

Thursday, January 05, 2012

NinjaDorg's Fortune And Glory: The Cliffhanger Game Review


Prelude:

Flying Frog Productions bring us another attention-grabbing genre movie, sorry game, with Fortune and Glory: the Cliffhanger Game.  The same PhotoShop -> Filter -> Artistic -> Drybrush effect is used once again throughout the design of the game on a series of photos of actors, models and friends of the game’s makers in period outfits, posing at various locations with lots of interesting props.  Some people might not like this design format, and whilst I usually prefer digital/painted artwork I must say I like it a lot, and think it nicely fits that B-movie feel FFP’s games have, whilst also letting their games stand out from the crowd.
Biases - I love A Touch Of Evil and Last Night On Earth, but don’t like the look or theme of Conquest of Planet Earth or Invasion From Outer Space.


What is it?

‘Indiana Jones: the Board Game’ without the appropriate licensing.  No getting around this glaring comparison.  FANG homages old school pulp adventure stories/comics/movies and lets the players become have-a-go heroes who take on the evil Nazis (or the curiously worldwide mob if you prefer) in a race around the planet to accumulate allies and gear and find artifacts of great power that will save or destroy the world.


How does it play?

Roll for initiative, roll for move, draw a (usually) nice Event card if you get a 1 on either roll, move to a location, flip a card, try to find an artefact by overcoming a series of dangers/encounters, gain Glory for successful encounters, use Glory to buy stuff, take artifact back to a city to sell it for Fortune, repeat until you get 15 Fortune and win.  This is not a Euro.

The main element is that you’re chasing artifacts which are “dynamically generated” - two cards are put together to determine the artifact’s type and object, e.g. ‘The Eyes’ artifact with ‘of Medusa’ adventure.  Each has a number of dangers you must overcome and if you fail one you flip the danger card over to reveal a ‘Cliffhanger’.  Your turn ends and you must overcome this more deadly danger on your next go or get KO’d and lose stuff.


What are the bits like?

For the most part, Glorious:

The map of the earth is a really beautiful board – on a par with the Tales of the Arabian Nights earth map, which I feel is really saying something.  It evokes the unexplored, exaggerated feel of the time with an emphasis on theme with countries like “The Heart of Africa” and “Amazon Falls” rather than geographical accuracy/consistency.  Also feels pretty sturdy.
The minis are really great quality and are what you have come to expect from FFP, with a range of heroes and villains and their henchmen, some temples, and a nice Zeppelin to boot.
FFP’s cards – and there are hundreds of them in FANG - might actually be my favourite in any board game.  They feel so sturdy I haven’t yet sleeved an FFP game.  Love them.  They also look great too, really like how they’ve captured all the different elements.  And there is lots of replayability in there – you’ll barely touch most of the decks in a given game and there are a lot: Events, City events, Enemies, Nazi Enemies, Gear, Allies, Adventure/Artifacts.
Great tokens, nicely designed, tactile, thick and generally easy to see on the board.  Again, a great standard maintained by FFP.
16 dice.  Can’t have too many dice.  You get 8 white for the heroes, and 8 green for the villains.  Though having rolled better with the greens repeatedly, I switched em around.  Scientific logic that.

But occasionally, UnFortunate:

Over 100 plastic coins!  This was a big mistake I feel, the ‘5’s can be hard to distinguish from the ‘1’s at a glance, and the plastic is ugly, garish blue and off-yellow/gold and pointless.  It looks like it’s from my two year old’s cash register toy.  Cardboard tokens like the Investigation tokens from ATOE would have been much better and prettier, and presumably less costly for all involved.  Worst of all, the box cover advertises “over 160 plastic bits” without the addendum “most of which are these garbage toy coins”.
Music – the included CD is the same quality as the other FFP games.  And love it or hate it, my strong feeling is that these should be optional, rather than included in the box.
Massive – the box is really massive, and doesn’t really warrant the space.  Only the board fills it, so if that had come in two parts or something they could have made it LNOE/ATOE sized, or maybe the size of the D&D Adventure System games.  As it is the thing is pretty unwieldy and difficult to store.


What’s new for FFP?

I think scope is what they were going for with this one.  There’s a high-falutin’ sense of adventure as you race around the world hunting for ancient temples and treasures and fending off villains, racing down city streets or crashing cargo planes into mountains.  And the array of elements included in the gameplay such as various effects on artifacts you are pursuing (some positive, some negative), the spread of villainous henchmen across the world, collapsing temples, a roaming Zeppelin dispensing Nazis around the globe, evil hideouts to raid, the events and dangers of exploring cities, all these help feed the idea of a living world you’re exploring.  But it’s all very much an evolution of the A Touch Of Evil (and Last Night On Earth to a lesser extent) gameplay, so if you didn’t like that game then the chances are that this one won’t blow your mind.


How is it better than LNOE/ATOE?

More cards, feels like more variation and depth.
The best FFP board yet, puts the ATOE map board to absolute shame - and I liked it!
Feels more streamlined and fleshed out in its gameplay.
You can play cooperative, competitive, solo, or team games.
The Villains’ AI is simple but effective, and really puts the pressure on you when you’re racing for the same artifacts.
You can fight Nazis!  Just waiting for those LNOE Nazi zombies to turn up in LNOE now...


How is it worse than LNOE/ATOE?

FANG takes a longer time to play, and takes up more space.
It’s more expensive, and you don’t get significantly much more game for all that extra cash.  I got bought this as a great surprise Christmas pressie, but I probably wouldn’t have opted for it myself given the price point.  Which is a shame because I’d have missed out on a great game.
The Dangers are limited – as has been stated on the BGG forums before, there just aren’t enough Dangers, and these are the main challenges in the game.  For the first few games you won’t notice but when the same ones start emerging after repeated plays it can get samey, even if each has two possible Cliffhangers, chances are you (hopefully) won’t see them anyway.


If I only get one of the three games, which should it be?

Damn, why did I include this question??  It’s a tricky one, and probably comes down to which theme you prefer.  Which I think is a testament to FFP’s design skills.  I probably prefer A Touch Of Evil but I have all the expansions for that game so it’s an unfair comparison.
Pricewise ATOE and LNOE give probably as much game in the box, so it’s best to start with one of those first to see if you enjoy FFP’s design style, since it is very similar across all their games.  Unless your love for pulp adventures trumps zombies or gothic horror of course...


What’s the difference between Fortune and Glory?

I used to know before I played this game but now I don’t anymore!  For some reason you purchase things with Glory whilst your hero’s ultimate quest is to amass the most Fortune.  Which makes everyone seem more mercenary than heroic.  This has irked more than one or two people, and I still find the game designer Jason Hill’s explanation bewildering.  But seriously, you’ll soon get over this grammatical curiosity after a game or two and just get on with the adventuring.


Is it any good?

Yes.

There’s a lot going on in this game, and it feels like lessons have been learned from the previous releases even if they are mostly baby steps, like having the option of fixed movement for those who don’t like rolling to see ho far they can go, or making something potentially happen in every single space on the board.  The rules took a while to digest, and because there’s a lot going on it’s easy to miss or forget things on your first few plays.  And I still can’t find an explanation of the Fortune bonus on Location cards (we just stick the bonus under the artifact card if applicable). 

In a turn you have a decent choice of options – I’d read that people thought there was no skill involved and that you just go for the nearest artefact but I often found myself having to choose between different locations and whether or not to chance a city or event or an enemy, or try and pick up an event card en route to an adventure, or whether or not to try and camp down and heal instead of pressing on.

Overall: it’s a lot of fun!  It plays well and turns go quickly as downtime is spent watching others encounter a series of dangers and praying for their downfall (not played the coop version yet).  It can be a bit faltering as you get the rules down – there are a few more rules than I’d expected after A Touch Of Evil.  I’ve played a metric tonne of solo games and it’s still set up on our table for another multiplayer game tonight.  The solo game is hard to lose, you’ll soon want to ramp up the difficulty on that, similar for cooperative games.  But the competitive game is a heart pounding race to the finish.

It’s early to say but I reckon it’s up there with LNOE and ATOE, both of which I love.  And the soloable aspect is a huge bonus for me for when the wife is watching Eastenders, etc.


Summary

If money is no object, jump on in.  Otherwise you might want to consider your other options first.  Here’s a recap of the pros and cons...

Pros:

Fun game!
Really beautiful board
Brilliant cards
Cool minis
Great theme – really well implemented, smash those nazi scum!!
Lots of replayability in most of the card decks
Fast paced – actions are resolved quickly with a few dice rolls
Good choice of options in a turn
1-8 players
Option to play coop, solo, competitive, or in teams

Cons:

Price – very high for what you get (your country’s price may vary)
Rubbish plastic coins!
Music CD
Mahoossive box
Limited dangers


Tuesday, December 13, 2011

The Treacherous Dark of Khazad-dûm


Without any light they would have soon come to grief. There were not only many roads to choose from, there were also in many places holes and pitfalls, and dark wells beside the path in which their passing feet echoed. There were fissures and chasms in the walls and floor, and every now and then a crack would open right before their feet.
    –The Fellowship of the Ring, “A Journey in the Dark”
In The Fellowship of the Ring, J.R.R. Tolkien leads the Fellowship into the mines of Moria in the chapter titled A Journey in the Dark, but that chapter doesn’t begin in the mines and their suffocating darkness. It begins while the Fellowship trudges through the Misty Mountains, under the dim grey of the waning evening.
Tolkien works hard to establish the darkness–the very palpable and consuming darkness–of the mines of Moria, by establishing the presence and importance of light prior to the Fellowship’s first steps into the mines. The chapter contrasts the presence of light outside the mines with the truer, more profound darkness inside the mines. Even in the wintery night, the Fellowship finds light from flame, the fading sunlight, and the coming dawn. As readers, we’re made to understand that the darkness outside Moria comes and goes in cycles with the light. However, once they enter the mines, Tolkien carefully measures his mentions of light. Darkness abounds, but for almost the entire journey through Moria, only Gandalf’s staff sheds light. Even that light is dim.
The dark of Khazad-dûm
Why does this matter? In the Khazad-dûm Expansion for The Lord of the Rings: The Card Game, the darkness becomes a significant theme. Players wouldn’t feel like they were undertaking a trip through the perilous underground if the game were full of bright illustrations. Nor would you likely think much about the darkness if it weren’t reinforced.
Much as Tolkien used the words “dark” and “darkness” liberally through the second half of A Journey in the Dark, theKhazad-dûm design team decided it was important to reinforce the theme with Dark locations, Hazards, and other cards that would get you looking for any means to cast light ahead of your travels through the subterranean labyrinth.
Lead developer Lukas Litzsinger offers some insights on the coming darkness.
Developing the darkness
I knew that Khazad-dûm needed to portray the mines of Moria as a physical danger to the party. While it has its fair shares of enemies, even an empty Moria is a dangerous place. Crumbling passages and abandoned shafts create a treacherous landscape. Still, the most pressing design challenge was the darkness. How would this affect a party traveling through the mines? 
We made several attempts to give the darkness an active role in the game, such as with darkness tokens, but they all felt strange. They complicated the game more than they enhanced the theme, and we moved eventually to a more elegant solution. Dark locations are difficult to explore. This is both a theme and a mechanic, and you will discover thatDark locations have some of the highest quest point values in the game. Additionally, Dark locations get to be much more threatening as two or more build up in the staging area. They tend to boost each other’s threat as the darkness surrounds your party on all sides.
But in addition to darkness, we needed to represent light. So to represent the importance of light, we introduced aCave Torch (Khazad-dûm, 41) objective that the players use to place progress on these Dark locations.
However, the mines are filled with countless dangers, and while any light is a boon, managing the light is not always as simple as it first appears. While your Cave Torch is Burning Low (Khazad-dûm, 40) you’ll find the mines more threatening, especially the darkest of its Dark corners. Also, your Cave Torch can attract unwanted attention, and as you saw in an earlier preview, any enemies encountered have an uncanny ability to proliferate into more.
–Lukas Litzsinger, Khazad-dûm Expansion Lead Developer
Thanks, Lukas!
The dark mines of Moria hold many dangers, but some heroes push, undaunted, to search for Balin and his missing Dwarven colony. In our next preview, we’ll take a look at one of the doughty Dwarven heroes willing to brave a journey into the heart of Khazad-dûm!

Friday, December 09, 2011

Fantasy Quest Saga Tracker

Fantasy Quest Saga Tracker


This is an example Saga Tracker design for Fantasy Quest, this particular example is for the Assassinate Leader Saga.  The COMPLETE marker is a separate token placed over each element as it is completed.  For cooperative group quests every hero would have to complete that element at the same time, at the location designated by the saga to place the COMPLETE marker.

This would potentially help to track the progress of individual players' Sagas more easily, and help to flesh out group Sagas.

Thursday, December 08, 2011

The Watcher in the Water


Frodo felt something seize him by the ankle, and he fell with a cry. Bill the pony gave a wild neigh of fear, and turned tail and dashed away along the lakeside into the darkness. Sam leaped after him, and then hearing Frodo’s cry he ran back again, weeping and cursing. The others swung round and saw the waters of the lake seething, as if a host of snakes were swimming up from the southern end.
    –The Fellowship of the Ring
Elrond, the Elf Lord of Rivendell, is troubled by the great numbers of Orcs that plagued the heroes who escorted his daughter, Arwen Undómiel, across the Misty Mountains. He asks them to explore the mines of Moria, hoping they can determine if they are the source of the increased Orc activity, but before the heroes can explore Moria’s vast network of tunnels, they must first gain entrance…
Fantasy Flight Games is proud to announce The Watcher in the Water, the third Adventure Pack in the Dwarrowdelfcycle for The Lord of the Rings: The Card Game!
Dangers outside the Doors of Durin
Many players have already remarked upon the clever text of the Doors of Durin (The Watcher in the Water, 65) when the card was first revealed in the Dwarrowdelf announcement. Its flavorful recreation of the riddle that nearly stumped Gandalf and the other members of the Fellowship provides one of the highlights awaiting players with The Watcher in the Water.
Of course, fans of The Lord of the Rings have also eagerly awaited the dangers that lurk deep in the lake outside the Doors of Durin, and when it arrives, The Watcher in the Water will reward their anticipation. Seething masses of Tentaclessnake out of the lake to attack and ensnare those heroes who can’t find their way through the Doors of Durin. The tentacles strike swiftly, and heroes who can’t fight them off may find themselves Wrapped! (The Watcher in the Water, 76) and dragged beneath the surface of the waters. There’s no time to relax whileTentacles lash through the air; heroes who aren’t rescued in time will drown.
Into the heart of the Dwarrowdelf
The Watcher in the Water represents a turning point in the Dwarrowdelf cycle of Adventure Packs. Once they pass the Doors of Durin, the heroes of Middle-earth must explore the mines of Moria to find the cause of the increased Orc activity in the Misty Mountains. Yet they must first survive the perils of the fetid Swamps and the ferocious combat with the Watcher’s many Tentacles.
Look for this clever and action-packed Adventure Pack to hit the shelves in the first quarter of 2012!

Tuesday, November 29, 2011

Treading Boldly into the Mines of Khazad-dûm


Gimli aided Gandalf very little, except by his stout courage. At least he was not, as were most of the others, troubled by the mere darkness in itself.
    –The Fellowship of the Ring
The Khazad-dûm Expansion for The Lord of the Rings: The Card Game takes the game to a whole new level–the subterranean and labyrinthine tunnels of Moria! Within those vast, dark, Dwarven ruins lurk dangers terrible enough to cause even the stoutest adventurers to tremble. Your torch lights radiate a flickering light that spills onto grey stone walls, fading ever into impenetrable shadows. What is worse in that darkness–the endless, echoing silence beyond your footfalls, or a sudden drip or the clatter of falling rocks?
A journey in the dark
Khazad-dûm introduces a number of new Underground and Dark locations. While these new locations immerse you in your heroes’ subterranean journeys through the mines of Moria, they introduce a number of subtle mechanics. InThe Lord of the Rings: The Card Game, each location has a Threat value that represents the potential dangers awaiting your fellowship. Only by thoroughly exploring a location can you be assured it no longer shelters hidden enemies plotting their ambush or that it doesn’t hold some dark secret you may fail to uncover. In the dark of Moria, locations like Branching Paths (Khazad-dûm, 36) are more ominous than ever, and the darker your journeys, the more your fellowship will feel the darkness surrounding them on all sides, laden with hidden threats.
As the game continues to mature and evolve, the design team has found new ways to work with locations, and Khazad-dûm introduces new ways in which locations interact with each other and with other encounter cards. Since the game’s inception, fellowships have had to work to make sure hidden threats in unexplored locations couldn’t mount against them unchecked. The travel phase remains as important as ever; the locations in Khazad-dûm generally pose higher threats to your fellowship and require greater effort to explore than the locations from the Core Set and Shadows of Mirkwood cycle of Adventure Packs. Still, as one might expect travel through the ancient Dwarven realm’s network of dark tunnels to prove difficult and be laden with tremendous threats, one might also expect the Dwarves to be prepared to deal with these threats…
Untroubled by darkness
The Dwarves are miners, metal-smiths, and no strangers to the dark. The darkness troubles them little, and Khazad-dûm provides Dwarf characters with a number of means of progressing more swiftly through the shadows, Underground, and Dark recesses of Moria. While many players have noted how masterfully the Rohirrim excel at traveling and questing aboveground in the Shadows of Mirkwood, the Dwarves will soon take the lead undeground with cards like Untroubled by Darkness (Khazad-dûm, 10) and Ancestral Knowledge (Khazad-dûm, 12).
The Shadows of Mirkwood cycle saw the development of a number of strong deck-building themes, including Rohanand Eagles decks. In the mines of Moria, the remnants of ancient Dwarf culture surrounds your heroes at every step, and Khazad-dûm provides fans many exciting new opportunities to bring these stalwart warriors to life, including two new Dwarf heroes that let you play Dwarves of any sphere of influence.
Look for the Khazad-dûm Expansion to add new adventure and peril to your adventures in Middle-earth. This deluxe expansion for The Lord of the Rings: The Card Game is coming soon!

Monday, November 14, 2011

Legend of Drizzt: Hero Levelling cards for campaign play


Legend of Drizzt: Hero Levelling cards for campaign play

The following are the Levelling Hero cards for the Heroes of Legend of Drizzt.  They are for use with the Dungeons and Dragons Adventures System campaign rules which can be found here:


Thanks to Malone76 and GeckoTH for the templates!

Friday, November 11, 2011

Legend of Drizzt, Artemis and Jarlaxle vs Count Strahd of Castle Ravenloft


Drizzt, Artemis and Jarlaxle vs Count Strahd


And since I can't find an image of Drizzt Vs. Strahd, here's an image of Drizzt Vs. Red Sonja instead:


From the moment LoD was announced I always liked the idea of taking Drizzt Do’Urden up against Count Strahd in his Castle to see what happens.  For our group the setting of Castle Ravenloft is always the most interesting and exciting to return to.  Thematically it wins out over Wrath of Ashardalon and Legend of Drizzt, and in terms of difficulty you have ridiculously tough encounters that really paste the heroes over time, combined with standard monsters like the Wraith which casually spit out THREE damage at a time.  Much more intimidating than WOA or LOD.

Drizzt and Artemis were quickly chosen as heroes by me fellow adventuring buddies, and picking through the leftovers I thought I’d give Jarlaxle a try.  So, you know, don’t go looking for any narrative justification of our hero choices here.

It’s worth mentioning that we always use the Treasure Token rules from Wrath of Ashardalon which can seriously handicap your heroes, especially in the early adventures.  Basically instead of drawing a normal treasure card you usually end up drawing a measly 100 gold when you kill a monster (always draw treasure cards for beating villains though).  When you do finally draw a treasure, even if it’s just a Potion of Healing, you end up dancing a little jig at the prospect.  After each adventure you draw three treasures and may buy one with your haul of gold pieces.  Usually this results in the untimely murder of all the heroes after one or two adventures.  But if you do survive you can start building up your hero over the adventures, which is really satisfying.

Our favourite mini campaign is the triptych of the ‘Search for the Sunsword’ Adventure followed by the ‘Hunt for Strahd Parts 1 & 2’.  Search for the Sunsword eases you in nicely and you also get a cool boost – the Sunsword - when you beat it for taking on the next two adventures as the difficulty quickly spikes upwards.  Usually.

Last night we staggered into the crypts looking for Sergei’s Tomb and the fabled Sunsword.  Or half of it anyway.  For some reason we already had half of the sword, and for another reason we didn’t know who had the half that we already had...  had.  In any case spirits were high as we laughed about our mighty powers and Drizzt called in Guen the friendly panther straight away.  We shouted down the passageways at any hidden monsters, goading and verbally abusing the poor, restless dead as they awoke from their coffins and meandered towards us.

Things started off okay, as they always do, a little bit of damage here and there from monsters and nasty encounters with pseudopods and angry butlers and some gone off food which had become sentient.  Artemis went exploring and then throwing the revealed monsters for miles so that they’d never bother us – particularly useful against Gargoyles which he can place back on the empty start tile where they just resume their stone forms and sit there.

Then Drizzt decided to start rolling low, like really low.  And before we realised it, the monsters started stacking up and duplicate monsters came pouring out of the endless tunnels.  As the duplicate monsters activated, their monster friends whom Artemis had thrown back to the start tile began to catch up and before long we were running around fighting for our lives, wishing we’d brought a cleric along for some healing, cursing the stupid treasure token rules and getting generally pummelled and pinballed between monsters all over the dungeon.

Soon enough the 4XP Grey Hag (sitting inside the card sleeve of a Wraith) reared her ugly head from the monster deck and started moaning and throwing lightning at us, Drizzt got immobilised on her tile by a trap – but crucially not adjacent to her, as Jarlaxle I had spent every last utlity, daily and treasure I had, and Guen got taken out by a malicious fireball from a Blazing Squad (Skeleton).

Artemis was faring a little better and managed to level up after throwing a natural 20, then following it with two more natural 20s just to show off, but his misplaced monsters had all but caught up and after Drizzt hit the dirt we had to spend a healing surge.  This caused a Young Vampire Villain to appear and start waffling at us with theatrical gesticulations and amateur dramatics level direlogue about how we were powerful, but not that powerful, etc.

Rolling his eyes at the Vampire’s theatrics, and with just a handful of HP left Artemis found Sergei’s Crypt and grabbed the Sunsword.  Quickly realising it would be more effective in Drizzt’s multi-attacking hands he begrudgingly handed it over.  And then began the race back to the stairway where a frozen Gargoyle sat, waiting to attack.

Our feet beating stone we legged it back through the dungeon, some of us more quickly than others – hello Speed 7 Drizzt.  Piling onto the Gargoyle we took him down with a flurry of blows and then formed up on the stairway together.  A wandering Ghoul and some nasty friends (baffled discussion arose here: spider is ‘vermin’, but rat swarm is ‘animal’?) charged us at the stairway whilst the Young Vampire could be heard mincing and waltzing through the dungeon somewhere in the near distance.

We fended off the monsters’ attacks and Drizzt’s turn came around, since he was stood on the stairway with the Sunsword we were able to dash up the stairs and back out into the safety of daylight – a victory!

Our slim pickings had procured us a few hundred gold and we nipped back to Barovia for supplies from the moody townsfolk.

“One single Healing Potion?  That’s all we can afford?” spat Jarlaxle. 
“Be thankful we can afford even that, thanks to your pitiful efforts,” snarled Artemis.
“Can’t we all just get along, guys?  Group hug?” beamed Drizzt.

Counting our blessings that we even finished the adventure, we prepped ourselves for part one of the showdown, dubious of the fact that we’d have to take down Strahd’s Villain henchmen before we can even approach the man himself.  Considering we’d literally just run away from a weedy little Young Vampire and barely survived things were looking grim.  Artemis was level 2 and had his precious extra Daily power, but we were actually lower on treasures than we were before the first adventure.

Holding our breaths we descended once again into the crypts...

Relatively more cautious in our approach we sneaked about, concentrating on trying to take monsters out where possible instead of blindly exploring ahead.  A run of black tiles saw us fetch up many of the quest items quickly (Wooden Stakes, Silver Daggers, etc.) but also gave us a nasty run of encounters.  Constantly fighting enemies to keep our experience pile stocked for encounter cancelling we stumbled into the Arcane Circle where Strahd’s henchman awaited.

The Zombie Dragon.  We decided to stop exploring until we could take him out.  Artemis, having the most HP and feeling the most confident whilst boasting of his Parry and Strike power, went toe to toe with Strahd’s pet.  Meanwhile Drizzt, Guen and Jarlaxle circled the beast, taking potshots and collecting the remaining quest items, including the currently useless Dimensional Shackles (although in a distant room somewhere, Klak began to cack himself).

Throwing a hissy fit at the sniping heroes, the Zombie Dragon snarled and took a swipe at a passing Guen and sent her back to her home plane of existence.

“Nooo!” squeaked Drizzt.  Despite wanting to save our dailies for Strahd we instead decided to run in and blow them all on the Dragon.  Clouds of Darkness engulfed the poor thing as Drizzt used Twin Strikes, Artemis duelled it with his magic longsword, and then Jarlaxle launched a bracer of daggers at the beast, spectacularly missing it by miles.  Eventually the undead monstrosity went down and we tottered away from its spasm-throwing body.

Collecting our breath, with Drizzt and Jarl on low HP, Artemis explored the next tile only to discover the Secret Stairway where Strahd awaited.  A string of events summoned a human cultist to his side (we swap the cultists from WOA for the Kobolds of CR) and the bloody unwelcome Grey Hag appeared again too.

With resources low and HP lower we set about alternately attacking the Count and his allies.  With no powers left my attacks against him were going to be pretty ineffectual on account of the Vampire’s healing ability so I took aim at his cultist minion and launched a dagger into its cowled head.  As luck would have it I drew a Treasure Token with ‘Treasure’ on it, which meant I could actually draw a treasure card this time.  After my little “yay, a treasure” jig I performed an even bigger jig when the Dragontooth Pick (or Dragon Toothpick) turned up: +1 to hit and +1 damage if you roll 19+.

Drizzt and Artemis laid into Strahd and started well enough, especially since we only needed to get him down to 5HP before he turns into mist and we win this scenario (you only get to properly ‘kill’ him in part 2).  But our XP had dried up and the Crushing Walls trap came into effect followed by another series of ingenious traps.

Sidenote: every time we fight Strahd we get hammered by Traps in the final confrontation.  Every time.  I’m sure the encounter deck knows when we find him.  Anyway...

Dodging sliding walls and crossbow bolts we continued to fight the good fight and Artemis with his higher fancy shmancy Level 2 Hit Points drew the Count’s attention for the most part whilst Jarl and Drizzt chipped away at him.  After a few misses the Count eventually got a grip on Artemis and began to drain his blood.  Soon he was no longer the hero with the highest HP which meant the Count turned his attention to Jarl and Drizzt.  Activating after every one of our turns meant that the damage we dealt him started to heal when he struck back.

Soon we were fighting a losing battle, and when the Passage of Time encounter card turned up we all dropped down to 1 or 2 Hit Points each.  Grinning through bloodstained teeth the Count redoubled his attacks and took Drizzt out.  Jarlaxle attacked back valiantly and then the Count took him out too, before turning on a suddenly lonely Artemis.

We took a pause in the action to appraise the situation and allow our pulsing heart rates to subside a little.  We rolled up our sleeves, wiped our brows and pressed on.

Artemis attacked Strahd and hit, Strahd was down to 7HP (effectively 2HP because we only needed to get him down to 5).

Strahd and the Hag attacked back and brought Artemis down to 1HP, whilst healing Strahd back up to an effective 3HP.

Jarlaxle spent a surge and stood up, swung for Strahd and rolled a natural 1.  Strahd fought back along with a nasty encounter and Jarlaxle went down to 1HP.  Strahd now on 4HP.

Drizzt spent the last surge and stood up, swung for Strahd twice and hit him once with the Sunsword, bringing him back down to 2HP.  Strahd and the Hag and encounter fought back and Drizzt went down – on Drizzt’s next turn we would now lose.

Artemis attacked Strahd and inflicted 1 damage.  Strahd, Jarl and Artemis stood on (effectively) one Hit Point each.  Strahd attacked Artemis and missed.

All eyes on Jarlaxle.

Strahd has a ridiculous 19AC.  Wielding the Toothpick I’d need an 11 to win the game.  If I failed it would be Drizzt’s turn and we’d lose the game instantly.

50/50 chance (about 25/75 when you factor in my terrible dice rolling ’skills’).

Real life Drizzt decided at that very second he needed to go to the bathroom.

Artemis and I sat in silence and waited for his return.

Drizzt came back.

Sat down.

You could hear a pin drop.

So I rolled.

And this song has been stuck in my head ever since:


The Hunt for Strahd Part 2 to follow next week....