Hall or Nothing Productions Ltd

Wednesday, February 08, 2012

Mage Knight The Board Game - Obligatory “My First Solo Conquest Post” + EuroTrash Health Warning


I caught a bug from boardgamegeek that Mage Knight The Board Game was awesome and that I was missing out by not having it.  So I recently picked up seemingly the last UK copy of Mage Knight – I couldn’t find it anywhere.  Eventually I turned up a copy hidden in the RPG section of my FLGS where no board gamer would find it.  Or so they thought!

I have to say I was disappointed when I opened the box to discover that the Torvak mini was entirely missing from the game, and that the Round Order tokens were packed so tightly I can’t envision anyone receiving a pristine copy of those – mine were badly scratched up.  There were also errata in the rulebook for a couple of cards that should have been corrected before release.  After reading positive reports about Wizkids’ customer service I put in my request for replacement bits and am keenly awaiting the results of that, although a week later the order request is still just showing as ’received’.

Limping through the rule book for the past few days I’ve been bumbling through the learning scenario, you know, making the requisite number of mistakes to really start learning it, checking the geek threads to see what I’m doing wrong, and then realising that underneath all the perceived complexities and idiosyncrasies there’s actually a rather simplistic and pleasing game in here.

So what’s it all about?  Mages.  Knights.  Hard to say really.  You have deck building sort of like Thunderstone, with similar 'no dice' card-driven combat.  You have tile exploration like the D&D Castle Ravenloft games.  An overland adventure setting like Runebound.  The looming spectre of Magic Realm permeates the air, but having given up on learning that behemoth a long time ago I couldn’t comment further on comparisons there.  And you have different ways to interact with all the different places you visit (monasteries, keeps, villages, cities, ruins, tombs, dungeons, mage towers), but mostly this is buying stuff or killing stuff.  It's all very interesting, and at the moment I barely even consider long term strategy as I play.  It's all about: what the hell can I do with these cards this turn??

In terms of theme it’s not really up there with any of the other fantasy games.  I’ve seen other people attach narrative to the game but in my own experience (and maybe this will change with time) there are too many bits and pieces that detract from a narrative experience.  This is not a negative, just a by-product of the semi-complex, semi-euro design.  Plus the narrative itself is a little weird for those of us unfamiliar with the Mage Knight lore:

“You are a Mage Knight – an uber warrior with a ton of power and dubious motives given power and employed by people with dubious motives to alternately plunder, destroy and give gainful employment to a populace with dubious motives who will occasionally love you for destroying their cities and plundering their homes, although they may become temporarily narked if you burn their monasteries.  But not necessarily.  Oh, and you’ll conquer this whole country in 3 days or die trying.”

Three days just doesn’t feel very epic.  Although the game length will – Mage Knight takes a looong time to play, at least whilst you’re learning the game still.

Just briefly, here are some stat types you’ll find used in the game:


Move : standard spaces cost 2 movement points, hills cost more, mountains even more, etc
Block : creatures usually attack first so you need to block before you can attack back
Attack : for when you do fight back
Influence : for recruiting units to join you
Reputation : a + or - to Influence depending on how nice you've been to the locals
Ranged Attack : kind of like ‘first strike’, lets you attack enemies first unless they're ’fortified', e.g. in keeps or towers
Siege Attack : like Ranged attack but also works against fortified enemies, unless they’re DOUBLY FORTIFIED – that’s right, fortified enemies inside a fortified place
Rangey Siegey Tunnelly Mega Godzilla Attack for TRIPLY FORTIFIED enemies : okay this one doesn’t actually exist per se, although with certain card combo effects you can make it seem like it does.


You get 5 cards from your deck each turn and you build your deck as you go to try and combo up your cards in hand to do cool stuff.  An early turn might go:

“I use these two 'Move 2' cards to move 2 plains spaces (which cost 2 Move each) to get to that village and adjacent to those rampaging orcs, I challenge the orcs to fight, they attack me with 'Attack 3', so I use this ’Block 3' card to prevent that, then I use these two 'Attack 2' cards to give me 'Attack 4', they have 'Armour 4' which means I've just enough to kill them, they're dead.  That gives me 2 Fame (VPs) and the locals like it when you kill rampaging orcs so I get +1 Reputation too.  I think I'll lose that extra 1 Reputation to plunder this village since I'm here anyway, mwahahaahaaa...”  Etc.

The more cards you get the more advanced the cards get until you're comboing out of your arse trying to figure out the best way to lay waste to everything and burn the most monasteries.  Or you can be nice instead, your choice!


It is a very cool game.  It successfully manages to combine deck building, tile drawing, a weird fantasy theme, dice (albeit weirdly – they’re used strictly to generate available mana for each turn), a card draw/battle system, and a developing sense of pace.  I'm not sure how it works but it does and once you start playing it, it's nowhere near as complicated as anticipated.  So much so that I had some kind of a mental break last night after my gaming buddy left and I played a full Solo Conquest game until 3.30 this morning.

At this point I need professional help...

Our two player run of the introductory scenario took about 3 hours, as did my Solo Conquest game afterwards.  The two player basic game (Goal: merely find the first City) was competitive in the loosest sense in that I tried to convey the rules and give advice as we went.  We both scored fairly low after the allotted 3 rounds and there were only a few points’ difference between us.  I managed to leapfrog to the win at the end mostly by accident with some late game healing – my gaming buddy took a brutal pasting in the last turn which filled his hand with wounds and gave him the unenviable title of Greatest Beating, which dropped his score to just below mine.


I’m still learning the rules myself - and the Cities themselves can be mind blowing so I was determined to crack them last night.  I tore through a Solo Conquest game with Torvak (using Norowas’ mini) because I hadn’t used him yet due to his mini’s absence.  Goldyx was the elegantly implemented dummy player/timer and was consistent but never frantic – I managed to play all my cards before each round finished.

Time flew and after racing to explore the map, ducking into the occasional dungeon, assaulting three keeps and a mage tower, and slaying a ton of orcs; in the wee small hours of this morning I reached my first level 4 city, stocked full of angry people for me to destroy.  You get about 4 enemy units in each city with defensive and offensive traits and skills coming out of their arses.  But the Gold Units that you can gain in the later game help out a lot – with mighty catapults and crazy golems joining your army.  Plus I nabbed this mega artifact with a one shot ability of "skip the block and damage assigning part of one combat".  So the first city was a murder-fest because the poor bastards couldn’t fight back as my Mage Knight and his units stormed over the city’s defenses.

After appointing myself the new leader of the city I realised that defeating a city is a bit anticlimactic because there are no real immediate rewards other than the ability to trade there next turn.  I thought I'd never reach the second city and was pleased just to have got as far as I did.  Plus it was a level 8 city, which presumably was really tough.  It was the last Night of the game and I only had a few cards left so I raced over to the second city to see what I could do.  The city was near one of my 3 keeps so I was able to pull a few extra cards into my hand from the keep’s bonus ability.  Then, invading the city I pulled out some badass enemies and threw everything I had at them, cancelling enemy attacks with my units, pouring crystals into boosted magical attacks and slowly but surely taking them down one by one.

After an excruciating battle I wiped out all of the white (harder) enemies and had one measly grey (weaker but still tough) Golem enemy left but no more cards or uninjured units.  It was the last round of the game and at the end of my go Goldyx would signal the end of the game and give me one more turn to try and win.  Sadly this meant nothing to me because I had no cards, crystals, useful mana or units to do anything with.  I was spent.  I pored over my skills and stared despondently at my hand full of wounds and all my decimated units with a wound on each of them.

They stared back, pleadingly.

I needed to inflict 5 damage but the Golem had physical resistance.  I had a skill which I could use once a turn to get +2 Ice Attack that would beat his resistance, and another skill which reduced his armour by 1 for each resistance he had, so I still needed to rustle up 2 more damage to defeat the Golem and win the game.

It was then that I noticed my last unused Tactic card of the game, one which would allow me to reshuffle 5 cards from my discard pile back into my hand.  There were some great Advanced cards in that discard pile, but also a lot of basic non-Attack cards and a crap ton of wounds.

Going through the motions I let Goldyx declare game’s end and took my final turn, gingerly shuffling and drawing 5 cards:

A wound
Healing
Movement
Influence
Block

Not one attack card!

Luckily you can play any card except wounds for 1 basic effect, like Block, Move, Influence or, as in this case, Attack.  So I put down the four basic cards for Attack 4.

The Golem’s physical resistance halved this down to just Attack 2.

And he fell.

Giggity.

I had just scraped it and lost or used literally everything in the assault.  It was epic.  I scored about 140 points (will check that figure when I have the game handy later).

There's a lot going on in the game but the fundamentals underneath it all are fairly comprehensible.  It's just remembering all the little idiosyncrasies.  e.g. "when you do get an artifact you always draw 2 and pick 1", or "monasteries put advanced actions in the unit offer, not in the advanced actions offer".  It's not exactly intuitive.

It was awesome though, I had conquered both cities, and the second one was on the very last possible turn by the absolute skin of my teeth.


I may be in sore need of sleep and have a nasty crick in my neck, but I need another full session soon, Doctor Chvatil!


WARNING - this game may cause job-jeopardising sleep loss!


Tuesday, February 07, 2012

Fantasy Quest Game Layout


Here's another page from the new FQ rules version.  Any spelling and grammatical help is most appreciated!


Heroes in The Redhorn Gate, Part One - A spotlight on the heroes of The Lord of The Rings: The Card Game


From the original FFG article here:


Aragorn was the tallest of the Company, but Boromir, little less in height, was broader and heavier in build. He led the way, and Aragorn followed him. Slowly they moved off, and were soon toiling heavily. In places the snow was breast-high, and often Boromir seemed to be swimming or burrowing with his great arms rather than walking.
    Legolas watched them for a while with a smile upon his lips, and then he turned to the others. “The strongest must seek a way, say you? But I say: let a ploughman plough, but choose an otter for swimming, and for running over grass and leaf, or over snow – an Elf.”
   –The Fellowship of the Ring

With the completion of the Shadows of Mirkwood cycle and the release of Khazad-dûm, players now have far more heroes from which to choose as they build their fellowships, but how do you decide which to include? Are there any hard and fast rules about the best ways to combine heroes from different spheres? Have you ever wondered why The Lord of the Rings: The Card Game limits players to three heroes in the first place?

Let’s start by addressing the last of these questions first. While it’s true that players can choose to run fewer than three heroes, it’s generally not advised.

The rule of three

A two-hero fellowship (or even a solitary hero) may be able to make progress toward the quest for a period of time, while slipping beneath the notice of any enemies in the staging area, but eventually the mounting threats of locations and enemies are likely to catch up to a small party. The Lord of the Rings: The Card Game is intentionally balanced for three heroes.

The game’s designer, Nate French, explains:

Three is a really strong number for game design. It presents possibilities for different approaches to games that can appeal to different types of players. When you play a game, having to focus on three options can lead you to a balanced approach that works like a tripod leaning equally upon all three sides (a tri-sphere deck, with one hero from each of three different spheres), or you may take a split focus between a major sphere with support from a minor sphere (a deck with two Spirit heroes, and one Tactics hero, for instance). Still another option exists, and you can focus all your efforts on a single point of interest (a focused, monosphere deck).

Having only two options for heroes would be too limiting in possibilities; it creates situations that are all an either/or or a perfect mix. Four options, on the other hand, would start to enter the territory of allowing players to do “everything” right out of the gate, which would lessen the meaning and impact of selecting heroes in the first place.

Another nice aspect of having three heroes in The Lord of the Rings: The Card Game is that you have three major points of focus each turn: questing, defending, and attacking. With three heroes, your hero base can cover the three main points of the game. With four options, you would start getting to the point where you’re trying to spin too many plates at once. Card games are filled with constantly shifting rules as cards enter and leave play, and adding another multiplier can just prove overwhelming.
Split or focused spheres?

Nate offers both a nice definition of the challenges The Lord of the Rings: The Card Game offers fellowships and a similarly succinct definition of the various approaches players may take to building their fellowships. Each turn players need to divide their fellowship’s attentions between questing, defending, and attacking, and as they consider how best to meet those demands, players can choose to combine two or three spheres of influence, or rely upon the strengths of a single sphere.

Of course, your concerns for deck construction will be slightly different if you’re building for solitary play than if you’re building for multiplayer games. In multiplayer games, players can split the game’s three main tasks (questing, defending, and attacking) between the two decks, so that one player may be responsible for questing while the other may do the dirty work of defending and attacking. In solitary play, however, one fellowship must balance all three tasks.

Many players have long noted they’ve met with greater success when running at least two spheres, whether split between multiple players or combining heroes from different spheres in a solitary deck. This is because the spheres each excel at different aspects of the game (and different tasks). While there are no hard and fast rules about combining the spheres of influence, strong decks must have plans built into them to commit Willpower to the quest, defend and destroy enemies, draw cards, generate resources, and survive the nastiest Treachery cards the encounter deck can throw at them.

Typically, Spirit cards provide high Willpower and efficient means of canceling Treachery effects, Lore cards provide excellent card draw, Leadership provides resource acceleration, and Tactics provides you the means of surviving and quickly defeating even the nastiest enemies. If you draw upon the strongest and most appropriate cards for your deck’s theme from two or three of these spheres, you can gain the traditional benefits of both (or all three) spheres, and you may be able to focus your deck even more keenly than if you hewed to just one sphere.
Ploughmen to plough, otters to swim

While a deck’s “personality” may be most clearly expressed in a multiplayer game, even single-player decks can express dramatically different approaches to the game, starting with their selection of heroes.

QUESTER: Dúnhere (Core Set, 9), Éowyn (Core Set, 7), Theodred (Core Set, 2)
Starting threat: 24
A quester focuses on committing as much Willpower as possible to the quest, while facing as little resistance as possible. Éowyn and Théodred quest each turn, while Dúnhere skirmishes enemies in the staging area. Cards that reduce threat, such as The Galadhrim’s Greeting (Core Set, 46) and Gandalf (Core Set, 73), are key to the success of this deck as they allow Dúnhere to attack without ever first having to face an attack.

FIGHTER: Éowyn, Gimli (Core Set, 4), Legolas (Core Set, 5)
Starting threat: 29
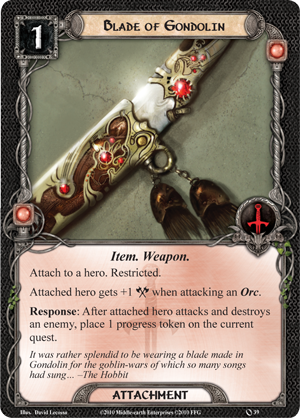
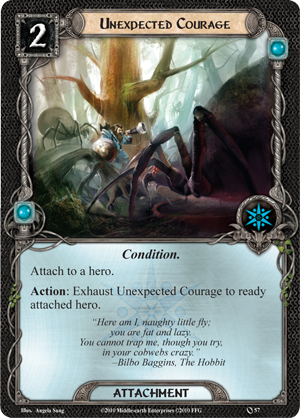
Unlike the quester, the fighter doesn’t shy away from getting down and dirty in combat. While Éowyn focuses on the quest, Gimli can take some hits and gets stronger for them. Legolas rewards you for fighting by adding progress tokens each time he helps defeat an enemy. An Unexpected Courage (Core Set, 57) on Gimli makes him a formidable combatant, and a couple copies of Blade of Gondolin (Core Set, 39) make felling foes even more rewarding.

SAGE: Beravor (Core Set, 12), Bifur (Khazad-dûm, 2), Bilbo (The Hunt for Gollum, 1)
Starting threat: 26
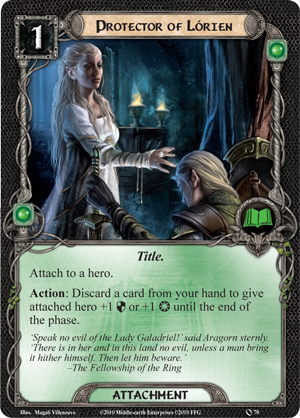
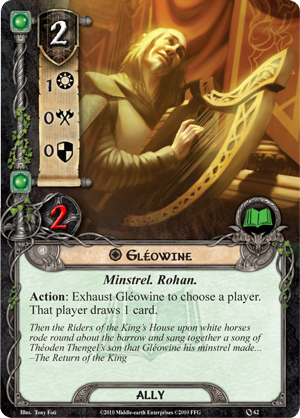
Knowledge is power, and knowledge in The Lord of the Rings: The Card Game is best represented by the cards and options in your hand. This focused trio of Lore heroes provides tremendous card draw, and you can add to it with Gléowine (Core Set, 62). The Lore sphere features a great number of cards to reduce the threat in the staging area and can convert card draw into Willpower via Protector of Lorien (Core Set, 70), but you’ll probably want to include some Songs to splash cards from other spheres.

PROTECTOR: Boromir (The Dead Marshes, 95), Eleanor (Core Set, 8), Frodo (Conflict at the Carrock, 25)
Starting threat: 25
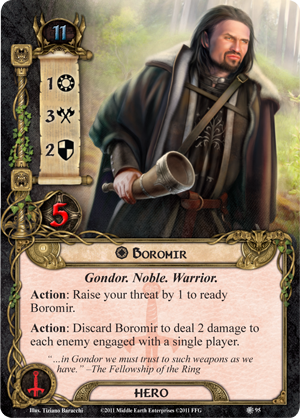
This fellowship plays its low starting threat against the optional threat increases it can trigger from Boromir and Frodo to gain extra actions. As with the quester, the protector benefits tremendously from cards that reduce threat, allowing Boromir to quest, defend, and attack every turn. Cards you play to boost Boromir, such as Blade of Gondolin and The Favor of the Lady (Core Set, 55), provide tremendous rewards as he can use them all every turn.

JACK OF ALL TRADES: Aragorn (Core Set, 1), Beravor, Frodo
Starting threat: 29
Starting with three spheres, this fellowship can do a little bit of everything. Aragorn allows you to play Steward of Gondor (Core Set, 26) to accelerate your resources, while Beravor accelerates your card draw. You’ll have a lot of options in your hand every turn, and Aragorn and Frodo provide you with action advantage. Aragorn can pay resources to ready himself after committing to the quest, and Frodo can serve as a “defender” even while exhausted, absorbing damage as threat in times of need.
Looking ahead
Are you wondering how these archetypes may change with the release of The Redhorn Gate and the subsequent Adventure Packs from the Dwarrowdelf cycle? Next week, Part Two of this series takes a look at the impact Secrecy is likely to have upon your starting fellowships. Then, in two weeks, Part Three takes a closer look at multiplayer roles and the new hero from The Redhorn Gate!

Monday, February 06, 2012

Fantasy Flight Games [News] - An Update on Star Wars: The Card Game

Fantasy Flight Games [News] - An Update on Star Wars: The Card Game:

'via Blog this'


In August, we announced the upcoming release of Star Wars: The Card Game, a Living Card Game® based on the original Star Wars trilogy. Today, we would like to share an update on its development.
Fantasy Flight Games’ current catalog of LCGs® offers a variety of exceptional and unique gameplay experiences, with the LCG® format among our most successful publishing categories. With this in mind, we want to make sure that Star Wars: The Card Game features a truly groundbreaking LCG® play experience.
The game we showed off at Gen Con 2011 would have been a strong addition to our LCG® catalog. However, as we were making the final touches to the product, we came to the realization that while it was a good game, it simply was not the greatest, most engaging game experience that FFG could deliver. So, we made a difficult decision and went back to the drawing board on the Star Wars: The Card Game design.
How will this affect the release date?
We are currently expecting to publish Star Wars: The Card Game worldwide just before the 2012 holidays. That said, it can be difficult to predict when the creative process will end, so this date should be taken as an estimate.
While we are disappointed that our original estimated release date will not be met, we are sure that our players would agree that our decision to delay Star Wars: The Card Game was the best one. We are absolutely confident that with the extra time this affords us, Star Wars: The Card Game will become one of FFG’s greatest products ever.

The Lord of the Rings: The Card Game - Foundations of Stone

Fantasy Flight Games [News] - Foundations of Stone:

'via Blog this'


“Something has crept, or been driven out of dark waters under the mountains. There are older and fouler things than Orcs in the deep places of the world.”
–Gandalf, The Fellowship of the Ring
Fantasy Flight Games is proud to announce the upcoming release of Foundations of Stone, the fifth Adventure Pack in the Dwarrowdelf cycle for The Lord of the Rings: The Card Game!
Deeper into the Dwarrowdelf
In the Dwarrowdelf cycle, several of Middle-earth’s heroes escort Arwen Undómiel safely to Rivendell. There, Elrond expresses his concern about the increased Orc activity the heroes noted through The Redhorn Gate and on the Road to Rivendell. He requests the heroes search the Misty Mountains for the cause of the region’s increased Orcish presence, and their search leads them first to the Doors of Durin, where they must battle The Watcher in the Water. Only after they manage to survive the perilous combat do the heroes enter Moria and wander The Long Dark.
Onward and deeper, they press into the mines of Moria. Hazards slow their movement and threaten their health. Orcs confront them at every turn, but with little sign of true leadership or organization. Still, the heroes feel they are ever closing in upon the true source of the Orcish activity. Their search leads them deeper and deeper, down into Moria’s Foundations of Stone.
Trapped!
The new scenario in Foundations of Stone traps the heroes in treacherous underground currents, washing them into the dark waters where the nameless things lair. Older and fouler than Orcs, they will test your heroes to the utmost limits of their resilience. Confronted by an Elder Nameless Thing (Foundations of Stone, 126), washed into the dark, watery recesses of Middle-earth, and with no one to rely upon but themselves, will your heroes survive the trials they face below the Dwarrowdelf’s Foundations of Stone?
Relics lost beneath the mountains
While heroes face all-new dangers and quest mechanics in Foundations of Stone, they find unexpected treasures far beneath the mountains. A pair of powerful Artifacts show up in the least likely of places–the encounter deck–that can give your heroes the edge they need to survive their battles with nameless things. Dwarf characters, especially, will take heart from the discovery of these items, including Durin’s Helm (Foundations of Stone, 120).
Discover Dwarven Artifacts, face the terrifying nameless things, and move closer to the root of the increased Orcish presence within the Misty Mountains when you travel beneath Moria’s Foundations of Stone.

Friday, February 03, 2012

Drizzt Vs Strahd – The Hunt For Strahd Part 2


Drizzt and Artemis and Vs Count Strahd – The Hunt For Strahd Part 2


We have played a LOT of the D&D Adventure System.  But I can’t tell you the number of times we’ve lost to this scenario.  Actually I can: every time we’ve played it.  But this time we were determined to defeat the evil Count.  So much so, in fact, that we also agreed to follow the adventure book’s advice for when you’re feeling down and take three healing surges with us instead of two.  Two surges is just never enough for this high level scenario.  Especially when you start out a player down.

Drizzt: “This shit just got real yo.”
Artemis: “What?”
Drizzt: “When we finish this Count Drac-...  Strahd off for good, we’re going to go and pummel that stupid red dragon Asharno-Ashnoarad-Ashlonaren-....  Ashley.  We will end him.”
Artemis: “You see, this is why you and I are mortal enemies.  I just can’t stand even the way you speak.  You know, this celebrity team-up is not going to last much longer, I’ll tell you that right now.”
Drizzt: “Shh.  Look, a messenger pigeon.  It’s from Jarlaxle.  It says...
“Dear Guys,
I’m sorry I can’t make it tonight.  I know we agreed we’d kill Count Strahd and end his centuries-long evil reign of tyranny, but I have football tonight.
All the best,
Jar.”
Artemis: “I knew that bastard would let us down.  I told you he would last time when he kept saying his leg was feeling better.”
Drizzt: “Let’s split his treasure.”

We’ve been playing the campaign rules with treasure tokens, which means actual treasures are few and far between but you get to keep them between adventures.  It’s more difficult, but more fun, and kind of balances out in the long term if you can survive.  On the last adventure I actually played Jarlaxle, but since the guy playing Drizzt wasn’t with us last night I took up the mantle of the the Realms’ Greatest Ranger instead and we decided to leave Jar-Jar at home.  Mmzomba loves Artemis so he stuck with the Realms’ Greatest Assassin, who was currently already level 2.

Assembling our powers and treasures we had a good start.  Artemis had some speedy boots which made him run as fast as Drizzt, plus he had a magic sword and a few one shot items.  Drizzt was carrying the Sunsword over from the Sunsword Adventure and had his good friend Guen the panther with him and with our pansified third healing surge we were feeling pretty confident.

As well as destroying Strahd for good, you also need to destroy all his coffins in this adventure.  This is tricky because if you wait until you’ve beaten Strahd you have to waste 10 turns smashing coffins and continue surviving any encounters and monsters left over.  However if you start too early you can have Strahd appear very early on and start munching on you – this is also bad because when you then reveal his lair he heals back to full strength.  So we decided to leave the coffins alone until after roughly the halfway mark before tipping them over and smashing them up good.

The brutalising nature of Castle Ravenloft Encounters never fail to surprise me, especially after a few games of Wrath of Ashardalon, or particularly Drizzt, which are almost friendly by comparison.  Within a few rounds the passage of time was sapping our strength, and every ounce of monster we defeated got discarded as soon as possible to cancel traps and nasty environments.  As usual, whilst beating up the minions we consistently drew “100GP” treasure tokens with nary a treasure card in sight.  But it didn’t matter, we had the Sunsword!

Guen made a guest appearance early on and dived onto a wolf for a tussle, which then promptly killed her.  I couldn’t roll for crap, so every attack Drizzt made with his paltry +6 to hit was a waste of a roll.  Thank goodness for Artemis then, who was plonking drawn monsters down as far away from us as possible.

As we plowed through the blazing skeletons, zombies, rat swarms and human cultists (swapped in from Wrath of Ash for the kobold skirmishers) the attrition kicked in and our hit points dwindled away alarmingly fast.  By the time we started kicking over coffins Strahd appeared in his crypt with a maniacal laugh, and a string of encounter cards saw him popping in and out of shadows, whispering in our ears, firing off fireballs at us and generally messing with our heads.

Artemis had set a conga line of monsters up chasing us from as far away as possible, which bought us a few turns to try and bring the pain on the old vampire lord.  But Strahd has this nasty healing bite which he does.  As quickly as we hacked chunks out of him, he’d heal back up by feeding on our blood.  Out with the Dailies!  We laid down everything we could on him, some of my attacks even landed – and when they did the Sunsword boiled through him with the +1 damage to Vampires.

Due to the layout we couldn’t effectively kite Strahd, and the monster conga was catching up.  Artemis fell into a sliding walls trap and was knocked unconscious.  I hammered away at Strahd and when he reached 5HP I smited him into mist on his own crypt tile.  This meant his next villain phase he merely reformed instead of fighting back.  I thought this meant I’d have a breather but a blazing skeleton rounded the corner and wiped me out with a ball of fire.

Artemis popped back up to his feet with a surge and some more precious HP before running over to Strahd, using his magic longsword to whittle away at the seething count.  The approaching monster horde included a ghoul, a wolf, a spider swarm, and the dreaded grey hag but we couldn’t afford to take our attention away from the count, who was fighting back valiantly.  With another nasty nip he brought Artemis down to 1HP.  I stood up after spending our second surge and redoubled my attacks.

After rolling like a n00b the entire game I cranked out a strong hit followed by a natural 20 which saw Strahd’s arm lopped off shortly followed by his head and a comforting musical chord as Drizzt levelled up.  Slaying villains always gives you a treasure card in our games because there’s nothing like killing a centuries-old vampire and getting a bag of copper pieces.  So I excitedly drew my reward from the combined treasure deck of LoD/Cr/WoA.

A scrimshaw charm – “reroll one die”.  Yay.  It was Strahd’s last laugh.

But then we realised we still needed to destroy 4 coffins, all blocked by an army of incoming minions who were really unhappy to see their landlord obliterated in front of them.  “But we’ve FREED you!” I cried.  To no avail.

We had 1 hit point each and that precious third healing surge between us.

Artemis used his cloak of the bat to race right across the dungeon, through the line of monsters, eviscerating a ghoul en route and landing next to a coffin which he promptly threw open.  A trap!  The poison dart shot out and knocked Artemis unconscious.  Despair set in.  We’d come all this way, killed Strahd, and now we were going to die because of a bunch of trapped sarcophagi??

I seemingly had nowhere to run and was seriously contemplating charging into the middle of the monster swarm to go down in a blaze of glory when Mmzomba pointed out a corridor tile equidistant between monsters which would leave Drizzt unreachable to monster attacks this turn.

Leaping across the monsters in the way I bravely went and hid in the corridor.  Since Artemis was down the monsters started moving towards me instead, and the encounter card for not exploring turned out to be a crippling miasma which slows movement.

Artemis spent our last third surge, stood up and raced to the next coffin, flipping it over and discovering some holy water!  His encounter revealed a gargoyle, which he cleverly placed miles away from anywhere so it would not affect us.  The monsters nearest to him had headed towards me last turn and would slowly but steadily start making their way back towards Artemis now.

Which meant I’d have to charge through them to reach the coffins.  If I ran with a double move I’d reach a tile with two monsters on it, and automatically die from their attacks, so instead I walked over and attacked the spider swarm.  The scrimshaw charm turned my two pathetic misses into one successful hit and the spider swarm went down.  I opened the nearest coffin: empty.  The blazing skeleton and grey hag reached Artemis and laid into him brutally bringing him down to 1 measly hit point.  Again.

Recovering from the attacks, Artemis turned to the monsters with revenge in his eyes and Mmzomba picked up the die to roll.

“No!  Leave them!  Get that last coffin!”  I cried, happily risking waking the baby and thus potentially bringing the wife charging downstairs in a fume.

Reluctantly leaving his quarry, Artemis raced over to the final resting place of Strahd and smashed it up with an angry pair of Boots of Speed, probably destroying the Wooden Stake that was hidden in there.

Victory at last – Strahd was defeated and our heroes were all well and healthy!!  Well.  We had two hit points between us anyway.


We’ d also accrued over 2,000GP so the shopkeeper in Barovia was very happy to see us and Artemis bought a shiny new ring which fired shooting stars.

“Save it for Ashardalon,” Drizzt winked...


Tuesday, January 24, 2012

Fortune and Glory - New Dangers

Below are a couple of potential new Dangers in the interest of boosting the somewhat sparse Dangers deck.


Tuesday, January 17, 2012

NinjaDorg's The Lost Road - ace review at La Taverne du Jeu

Our good friend freourslc over at the Tavern has delivered this brilliant, humbling assessment of our very own Lost Road solo adventure for The Lord of the Rings: The Card Game. Be sure to check it out here:

The Lost Road - a fanmade expansion for LotR - LCG - News - La Taverne du Jeu:

'via Blog this'


Thursday, January 12, 2012

The Long Dark of Moria


It was after nightfall when they had entered the Mines. They had been going for several hours with only brief halts, when Gandalf came to the first serious check. Before him stood a wide arch opening into three passages: all led in the same general direction, eastwards; but the left-hand passage plunged down, while the right-hand climbed up, and the middle way seemed to run on, smooth and level but very narrow.
    –The Fellowship of the Ring
Fantasy Flight Games is pleased to announce the upcoming release of The Long Dark, the fourth harrowing Adventure Pack in the Dwarrowdelf cycle for The Lord of the Rings: The Card Game!
After a brutal conflict with The Watcher in the Water, several heroes of Middle-earth pass through the gates of Moria and begin to scout its ancient tunnels for the root of the increased Orc activity in the Misty Mountains. But it has been many ages since the Dwarves last gave light to the mines. The way is dark and choked with foes and hazards. The ominous dark lingers ever before your party, closing in around you, making it difficult to tell one path from another, and you must be careful to keep your way…
Lost in the mines of Moria
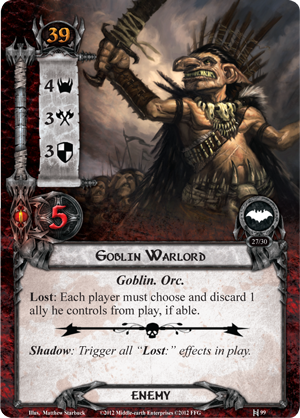
The Orcs of Moria are multitude, but your heroes seek signs of the forces that draw the Orcs together and drive them out into the mountains. As your heroes begin their journey into The Long Dark, they find pockets of Goblin resistance, but with little organization save for that provided by Goblin warlords. To discover the deeper roots of the increased Orc activity, your heroes must delve deeper into the Mines.
The Long Dark introduces 60 new cards, including a new hero, three copies of each player card, and an all-new scenario that pits your heroes against bands of Goblins, the hazards of traveling in the dark, and the risk of getting lost. As your heroes travel through the DarkUnderground realm of Moria, they must navigate carefully or suffer the consequences of losing their way. Any wrong turn may tax your heroes’ energy and limit their options, discarding cards from your hand, or it may lead into a host of Orcs, spiders, and rock adders.
The wealth of Moria
“The wealth of Moria was not in gold and jewels, the toys of the Dwarves; nor in iron, their servant.”
    –Gandalf, The Fellowship of the Ring
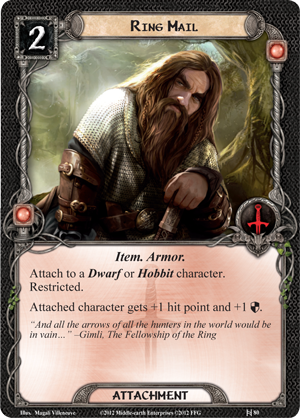
The Long Dark poses unique challenges to your band of heroes, but it also provides them with new resources. Four new allies offer their assistance, and your heroes can make use of a number of new events and attachments, including sturdy Ring Mail (The Long Dark, 80).
Originally shown in the announcement of the Dwarrowdelf cycle, Ring Mail has already spurred conversations among fans on our community forums. With the release of The Long Dark, you will be able to better protect your Dwarf and Hobbitcharacters from the hordes of Orcs and Goblins that harry your fellowship through the mines. Perhaps, the extra defense your heroes gain from their Ring Mail may be the edge between success and failure in their quest.
Don your Ring Mail, stock up on provisions, and prepare yourselves for adventure as your party sets foot into the mines of Moria and confronts The Long Dark that awaits them. This challenging and suspenseful Adventure Pack is scheduled to release in the second quarter of 2012!

Tuesday, January 10, 2012

Boromir's Guide to Deck Construction, Part One

Fantasy Flight Games [News] - Boromir's Guide to Deck Construction, Part One:

'via Blog this'


“Believe not that in the land of Gondor the blood of Númenor is spent, nor all its pride and dignity forgotten. By our valour the wild folk of the East are still restrained, and the terror of Morgul kept at bay; and thus alone are peace and freedom maintained in the lands behind us, bulwark of the West.”
–Boromir, The Fellowship of the Ring
One of the reasons The Lord of the Rings: The Card Game has entertained so many fans and enjoyed a great deal of success is because it appeals to people across a range of player archetypes–Bilbo, Pippin, and Boromir alike. The game’s narrative structure makes it easy to find a story in every game. Because it’s a Living Card Game, novelty seekers can find new cards to try in their decks and new challenges to face with each monthly release, and enough of the scenarios and their enemies pose sufficient threat to challenge the hardcore Boromirs, who seek glory through conquest. In fact, some of us are still waiting for the combination of cards that will allow us to beat Escape from Dol Guldur solo with a measure of consistency.
The lone traveler’s journey
The game has also found a good measure of success due to its rich solitaire play, but while confronting the challenges of Middle-earth may lead to memorable game experiences, they can also frustrate players with less experience in games with deck construction. The Lord of the Rings: The Card Game is unique among these games in that players compete against the forces of Shadow, as controlled by an encounter deck and its artificial intelligence. Still, the encounter deck has its fair share of devious tricks and an arsenal of deadly weapons. Accordingly, it is no simple thing to master the encounter deck and succeed at your quests.
Now that the Khazad-dûm Expansion has arrived, players will face a whole host of new challenges, and some have already wondered how they will fare against the goblin hordes of Moria.
Today, then, we begin a three-part series of deck-building tutorials aimed at the new solo player, but one that should contain helpful information (and reminders) for players of all experience levels.
Sharpening your blade
There’s much to be said for the decisions you make while playing a game, but we begin any conversation about success in a card game by looking at the deck.
While players may find many different card combinations and ways to approach the challenges before them, there are a number of larger, universal concerns that touch upon deck-building in any game, including The Lord of the Rings: The Card Game. No matter the scenario you intend to conquer, you’ll want to consider how your deck may provide you with action advantage, card advantage, and resource acceleration. Additionally, every card designer at some point talks about “synergy,” and it’s important to be able to recognize whether or not your deck is filled with synergies between cards, or if it’s a combination of 50 cards all seeking to do their own thing. Meanwhile, each card game introduces its own game-specific concerns, and in The Lord of the Rings: The Card Game, it’s always worth trying to maintain as low a starting threat as possible, and including some means of reducing it should it start to rise.
Today, we’ll go into a bit more depth about action advantage and card advantage.
Action advantage
Action advantage refers, generally, to the idea that you can do more than your opponent each turn. In a head-to-head game, like A Game of Thrones: The Card Game, you might gain action advantage through “board control” or a stronger “board position.” In short, if you have more and stronger characters on the table than your opponent, you’re more likely to win challenges and the game. In The Lord of the Rings: The Card Game, your heroes are limited in what they can do by the number of times they can exhaust. Do you choose to quest with your hero, defend, attack, or exhaust to use a special ability? Each of these is an “action,” and the more actions you can take, the better.
Part of the solution is to include allies. A lot of allies. Many successful decks are almost half full of allies. Allies who can quest allow your heroes to attack or defend. Allies who block enemies for your heroes allow your heroes to quest or attack. Allies are good and help you gain action advantage.
Another part of the solution is to build your deck around heroes who can ready themselves. Aragorn (Core Set, 1),Prince Imrahil (A Journey to Rhosgobel, 50), and Boromir (The Dead Marshes, 95) all come to your fellowship with built-in means of readying themselves. Still, there are other means of readying your heroes. Spirit heroes can help others find Unexpected Courage (Core Set, 57) or recruit a Westfold Horse-Breaker (The Hunt for Gollum, 6), and now, with the release of Khazad-dûm, your Dwarf heroes can get a boost from the Erebor Record Keeper (Khazad-dûm, 11).
Khazad-dûm introduces another card that clever players may use to find action advantage, Ever Onward (Khazad-dûm, 5). Certainly not the most glamorous of cards, Ever Onward may appear at first glance as though it’s merely a safety net. However, if you know you won’t fall deeper into threat by failing at your quest, Ever Onward can afford you a single turn in which for three-cost, all your characters remain ready to confront the enemies with which they are engaged, allowing you to withhold them from questing and assign them, instead, to defense and attack.
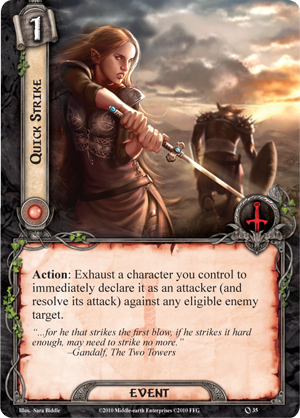
You can even find action advantage from cards that don’t provide you with extra actions but can let you “cheat” around the need to take actions. For example, Dúnhere (Core Set, 9) and Quick Strike (Core Set, 35) can let you attack enemies without first having to defend against them. They can save you the need to heal your characters later, prevent nasty shadow effects from resolving, and free you to focus on questing successfully.
Card advantage
Card advantage comes primarily in four forms. One is card draw. The more cards you can draw, the more options you hold in your hands. Another is subtler but no less effective, and that is the ability to do more with fewer cards. The final routes to card advantage are search and recursion.
There are only a handful of cards in The Lord of the Rings: The Card Game that accelerate card draw, and the best of them are ubiquitous among top players. Beravor (Core Set, 12) almost always receives the first copy (or two, or three) of Unexpected Courage when she’s present in the party. While it may seem like a waste of an action to exhaust her to draw cards rather than quest, defend, or attack, nothing could be further from the truth. Card draw is the backbone of versatility. The more cards you hold in your hand, the likelier you’ll be able to find the perfect response to any threat. Furthermore, if another of your heroes is a Protector of Lórien (Core Set, 70), you can convert Beravor’s card draw directly into extra Willpower toward the quest. Bilbo (The Hunt for Gollum, 1), Gléowine (Core Set, 62), and Ancient Mathom (A Journey to Rhosgobel, 56) also provide excellent card draw, as can Gandalf (Core Set, 73), when he isn’t busy wounding enemies or lowering your threat.
Gandalf’s versatility serves as an excellent illustration of the second type of card advantage. Not only is he a powerful ally with tremendous benefits while questing, defending, or attacking, but he also offers your party the pick of his three exceptional abilities whenever he comes into play. At five cost, he’s not cheap, but the combination of Gandalf andSneak Attack (Core Set, 23), both reduces the wizard’s cost and allows you to play him more times. This combination offers classic card advantage. Dwalin (Khazad-dûm, 1) offers similar card advantage with his ability to reduce your threat each time he defeats an Orc. The mines of Moria are filled with Orcs, after all, and if you can boost his strength, Dwalin can both clear away your enemies and control your threat, saving you a card slot you might otherwise spend onThe Galadhrim’s Greeting (Core Set, 46).
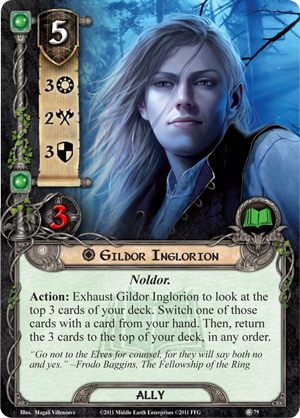
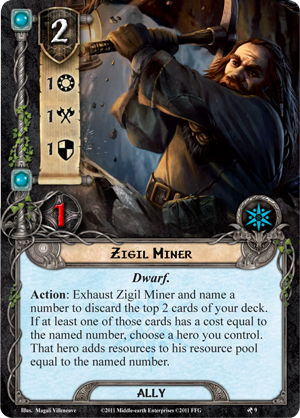
Finally, cards that search your deck, reorder the cards on top of your deck, or pull other cards out of your discard pile may not provide you with more options in your hand, but they may ensure you hold the right cards. Dwarven Tomb(Core Set, 53) can be as good as any Spirit card in your discard pile. Gildor Inglorion (The Hills of Emyn Muil, 79) is good not only for his excellent statistics; his ability to manipulate the top three cards of your deck can help you find the cards you need earlier than you would otherwise. Gildor’s search ability can also ensure the success of your Zigil Miner (Khazad-dûm, 9), leading to rapid resource acceleration… a fundamental of deck-building.